Hi, I've been following social groups and forums in trying to find any walkthroughs or how-to's when it comes to upgrading the audio. A lot of people says only an active sub is enough and other are content with only a EQ preset. I went ahead and splurged on some new "hifi" parts convincing myself whatever I saved in buying such a high value car can be justified for audio equipment.
I also wanted to try to document as much I could on the way so maybe others can do the same. My car is a left-hand driving, so I don't know how much is reversed for people in the UK.
Btw I had no experience in car-audio (im a nurse), everything I did I learned through watching youtube videos. Had never popped off a car panel in my life until I tried this.
Disclamer: I don't take any responsibility if your car is diffrent or if you break something.
Part list:
Amplifier: Match PP86DSP
Adapter harness: Match PP-AC88
Subwoofer: Match PP 10E-Q
Front speakers: Focal PS165FE Flax Evo
Adapter rings: 3D-printed at home; Thingiverse link
Door kit: Ground Zero Doorkit pro
Preparations for the install.
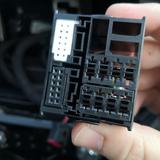
Since no one online could post pics of whats behind the EU head unit, I had to find out myself. Turns out the EU model is using a "quadlock" type to connect. The stock amp pulls power through pin 15+16 of the ISO-plug part. The speaker wiring seem to use standard ISO wiring. I also noticed there is plenty of space around the heady unit on both left and right side, but not big enough to put the PP86DSP amp in there. Maybe a small compact amp could fit in there.
Installing the amp
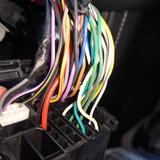
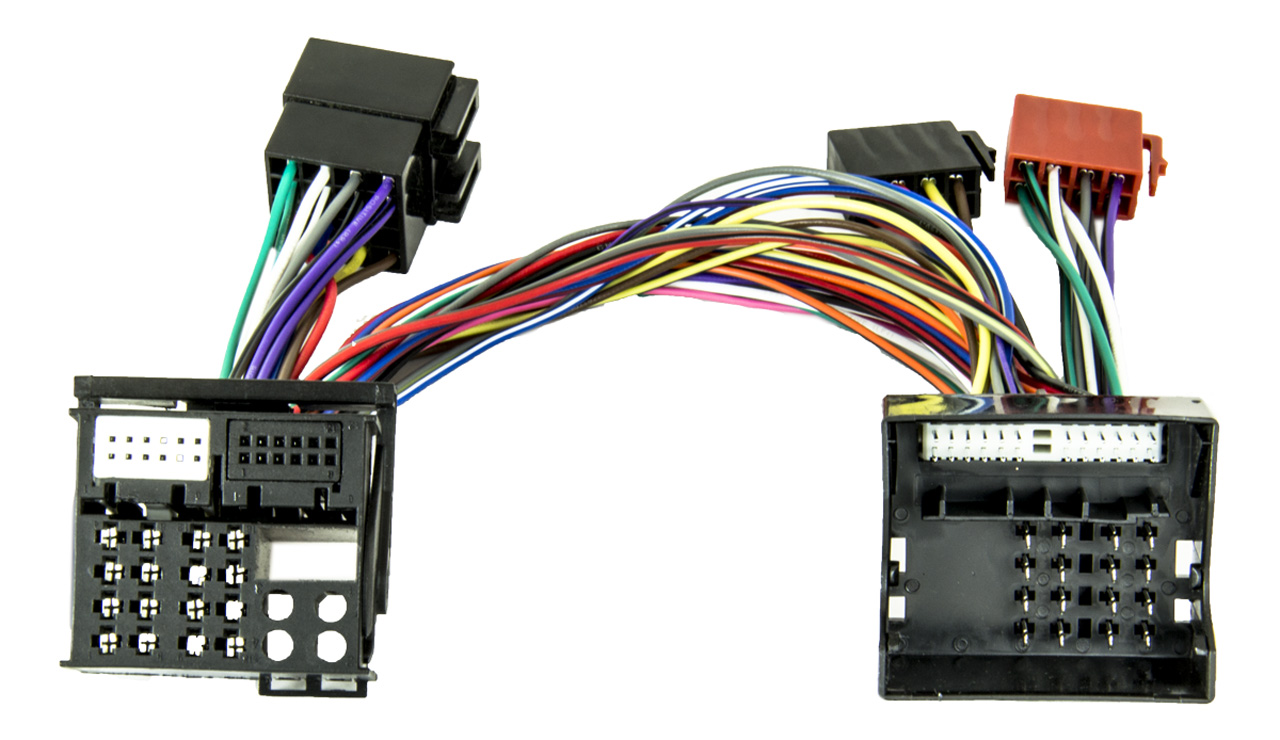
The benefit of the match amp is that its designed to follow stock cables, fetch the high output signal from the stock amp, feed it to the amp then return the amplified signal back to the speakers through the original cables. You can check This blog for some detail on how it is connected. Since MG does its own thing, I bypassed the black part of the adapter and only used the speaker out/in part of the harness. I didn't have my phone with me so didn't take any pics of my wire mess behind the head unit. My plan was to install the amp under the passenger seat.

[ Edit Coulomb: My best guess as to the intended image; was
now
]
Getting power to the amp:
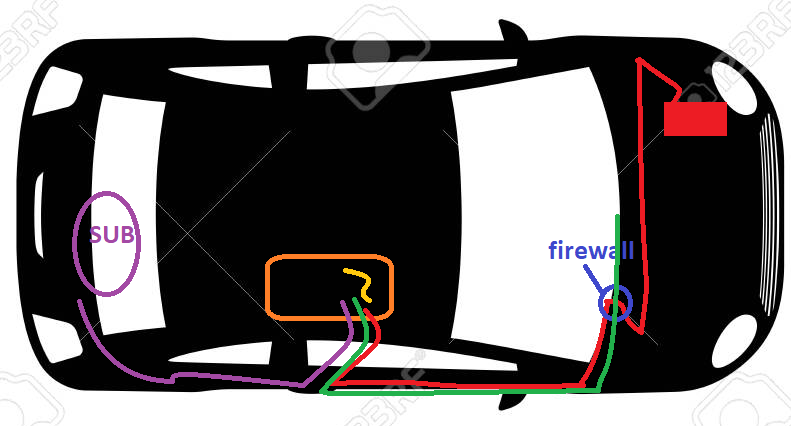
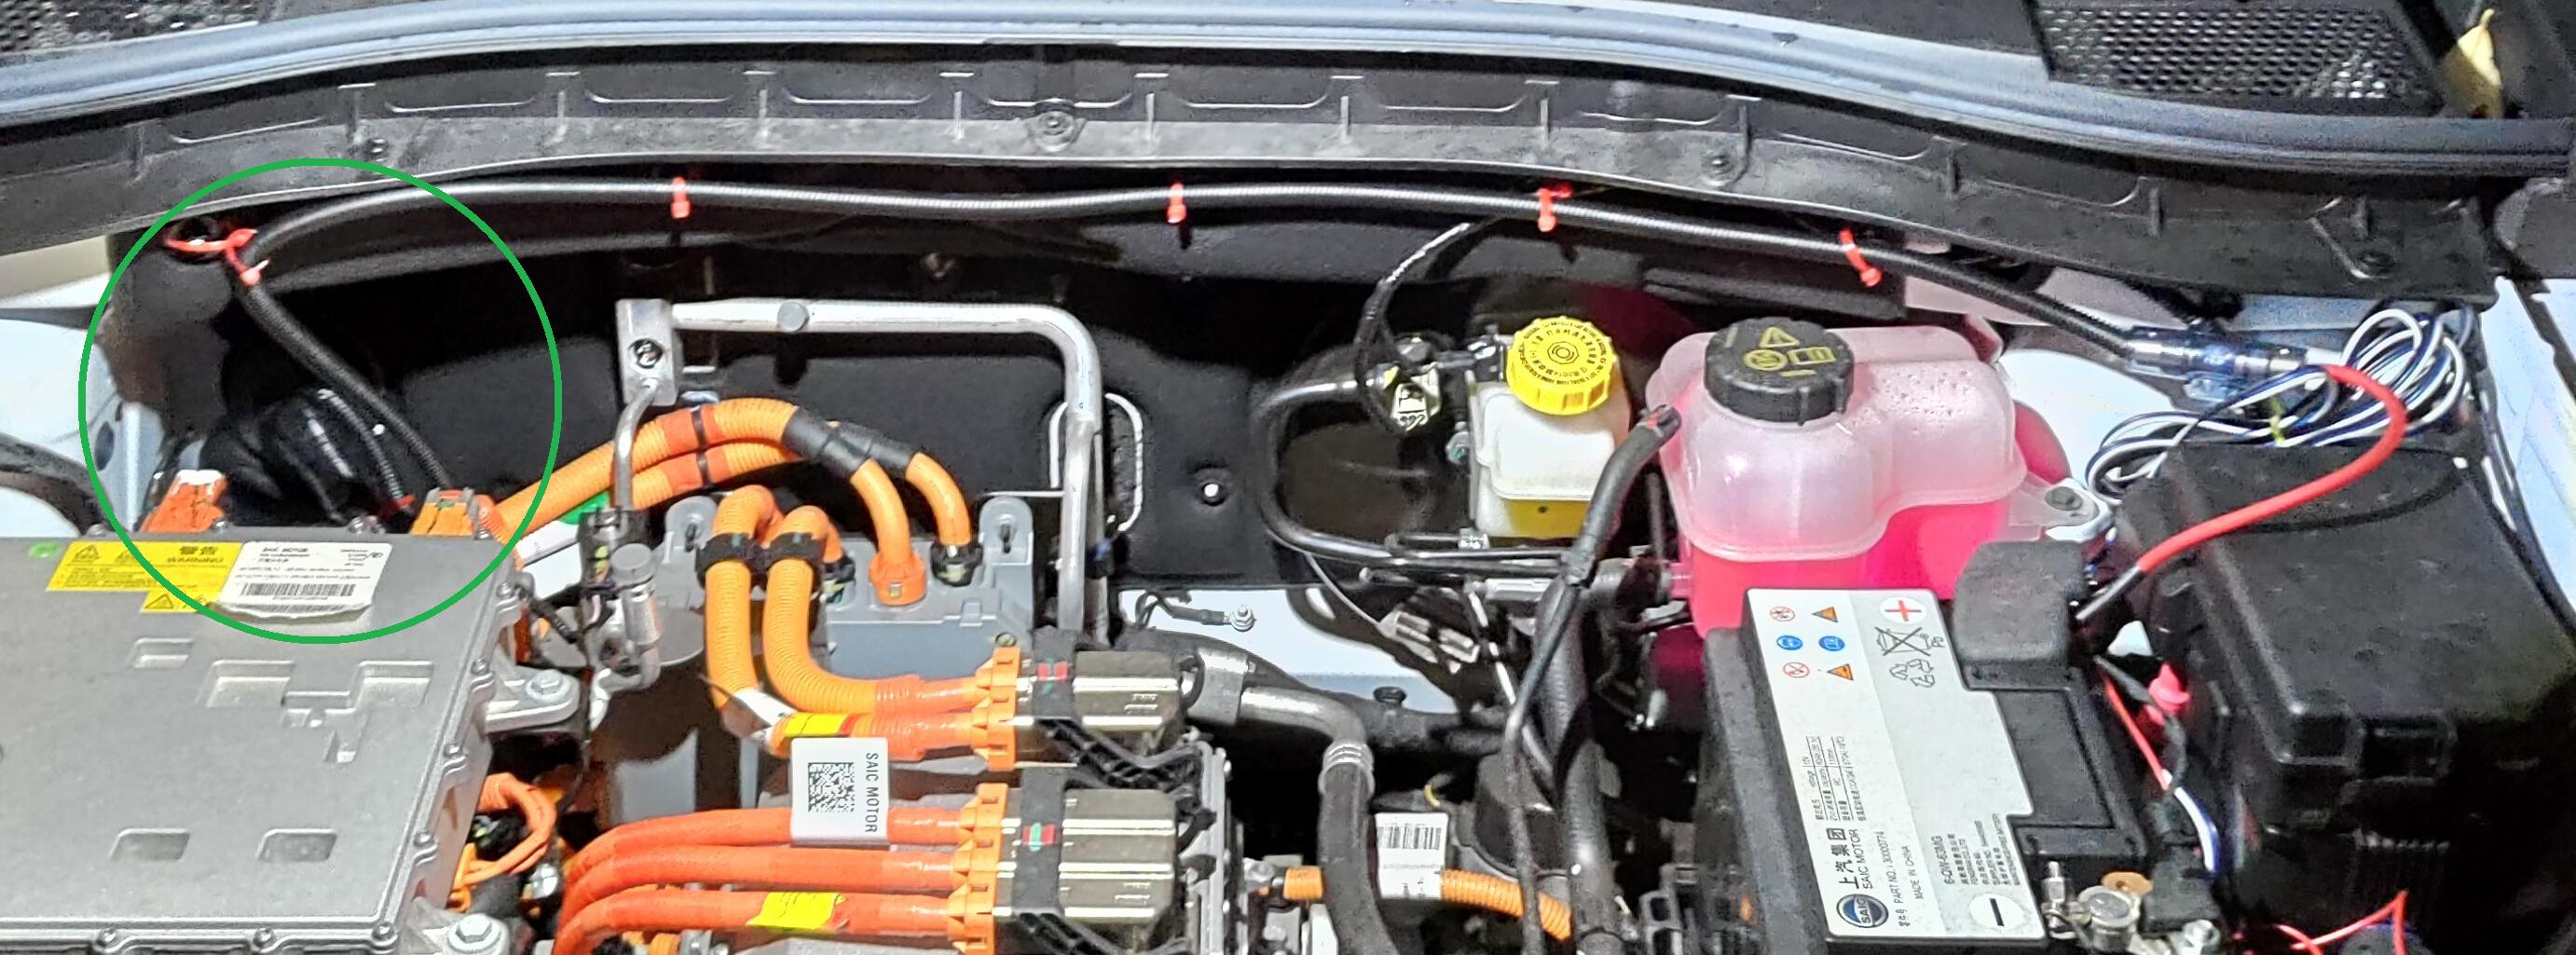
Finding a place to poke through the firewall wasn't easy. I ended up using the same gasket as where the all the rest of the cables enter the cabin, really hoping I would not damage any other wires.
Behind the glovebox is the fusebox and this extra box which is something to do with the radio. (ignore the temporary ground cable). Remove the two bolts to get better access to the gasket. On the second pic you can see the cable entering through.
To my frustration, the firewall features a double gasket, so make your your have the tools to pierce something through and also grab the wire.
Wire diagram: Red = positive energy, green = match amp cable, yellow = ground cable, purple = sub cable
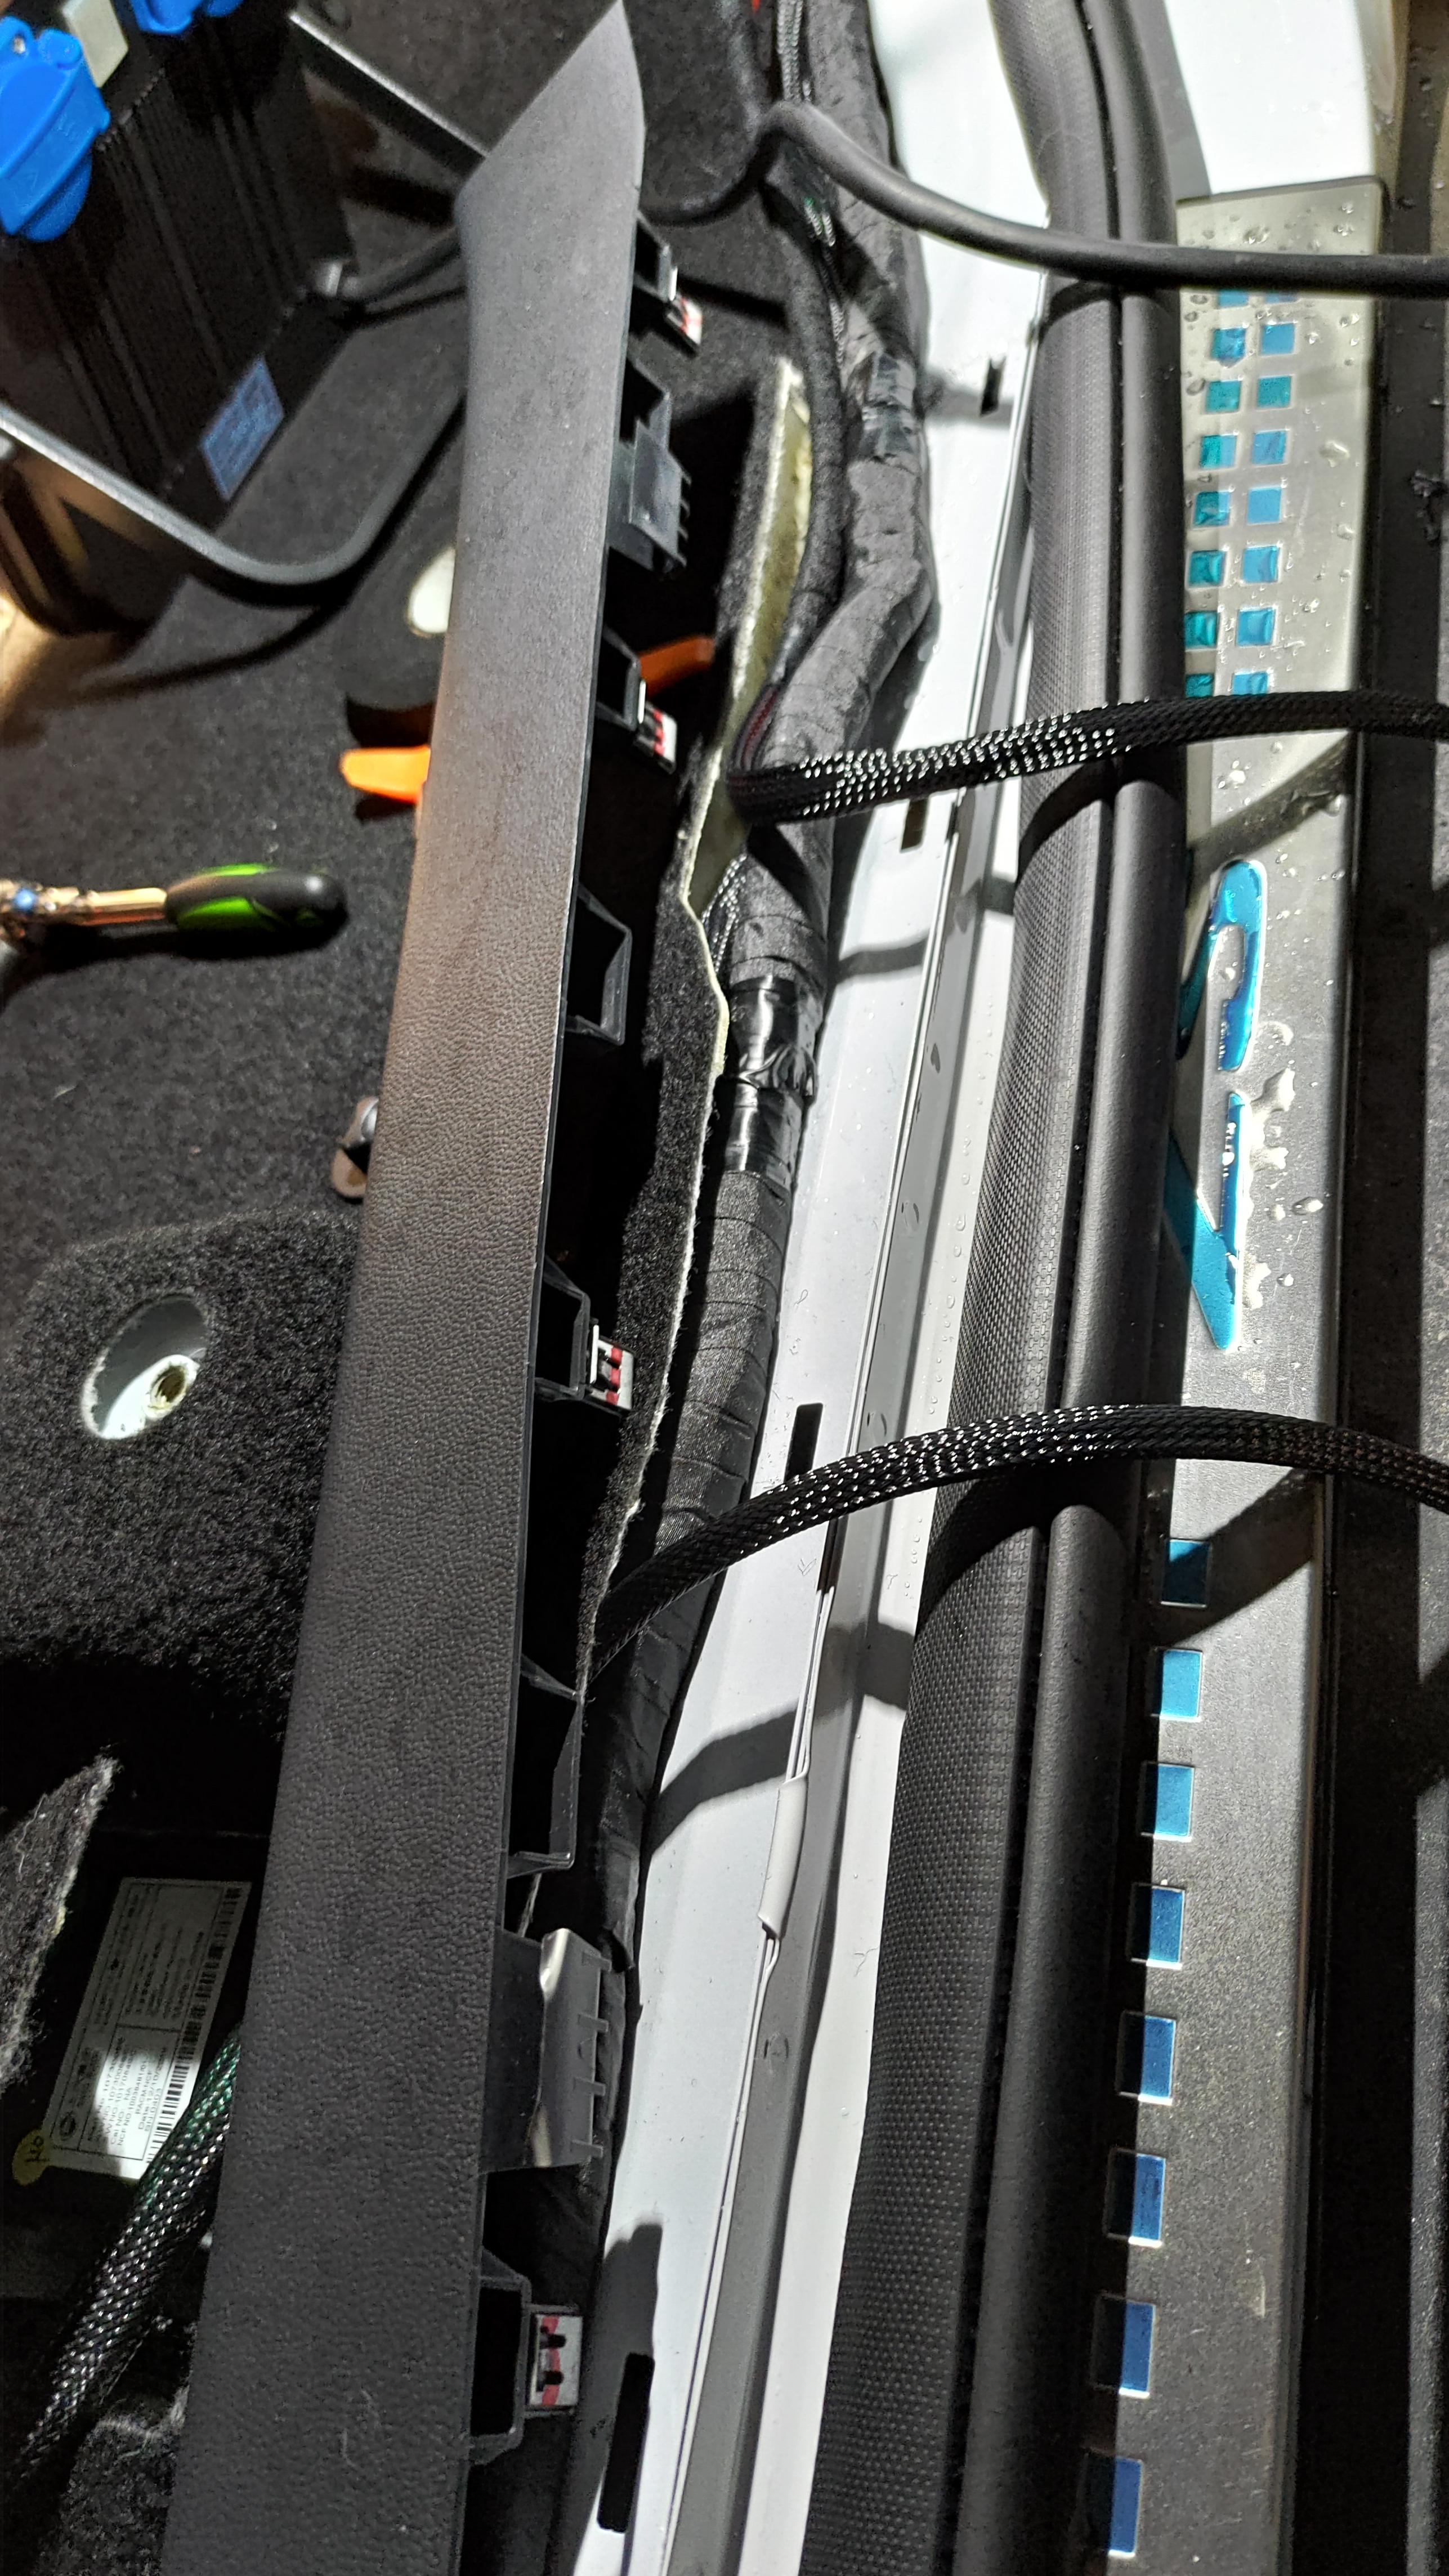
In order to remove the trims and panels you first need to pull off the gasket going around the door, its simply pulled right off and you only need to take a bit of it off to get to the trims. The stock cable is running through here but there is plenty of room for more. You can also see at the bottom part of the picture where I decided to go under the carpet to pull wires to/from the amp. The trim is really long and doesn't really come off properly, but you should manage to put cables in with it halfway off. Getting the subwoofer cable was a little tricky at the back door as the same piece of trim wasn't able to pop completely off, so I had to leverage with force to be able to squeeze in the cable, carefully making sure nothing of the trim would put pressure on any cables.
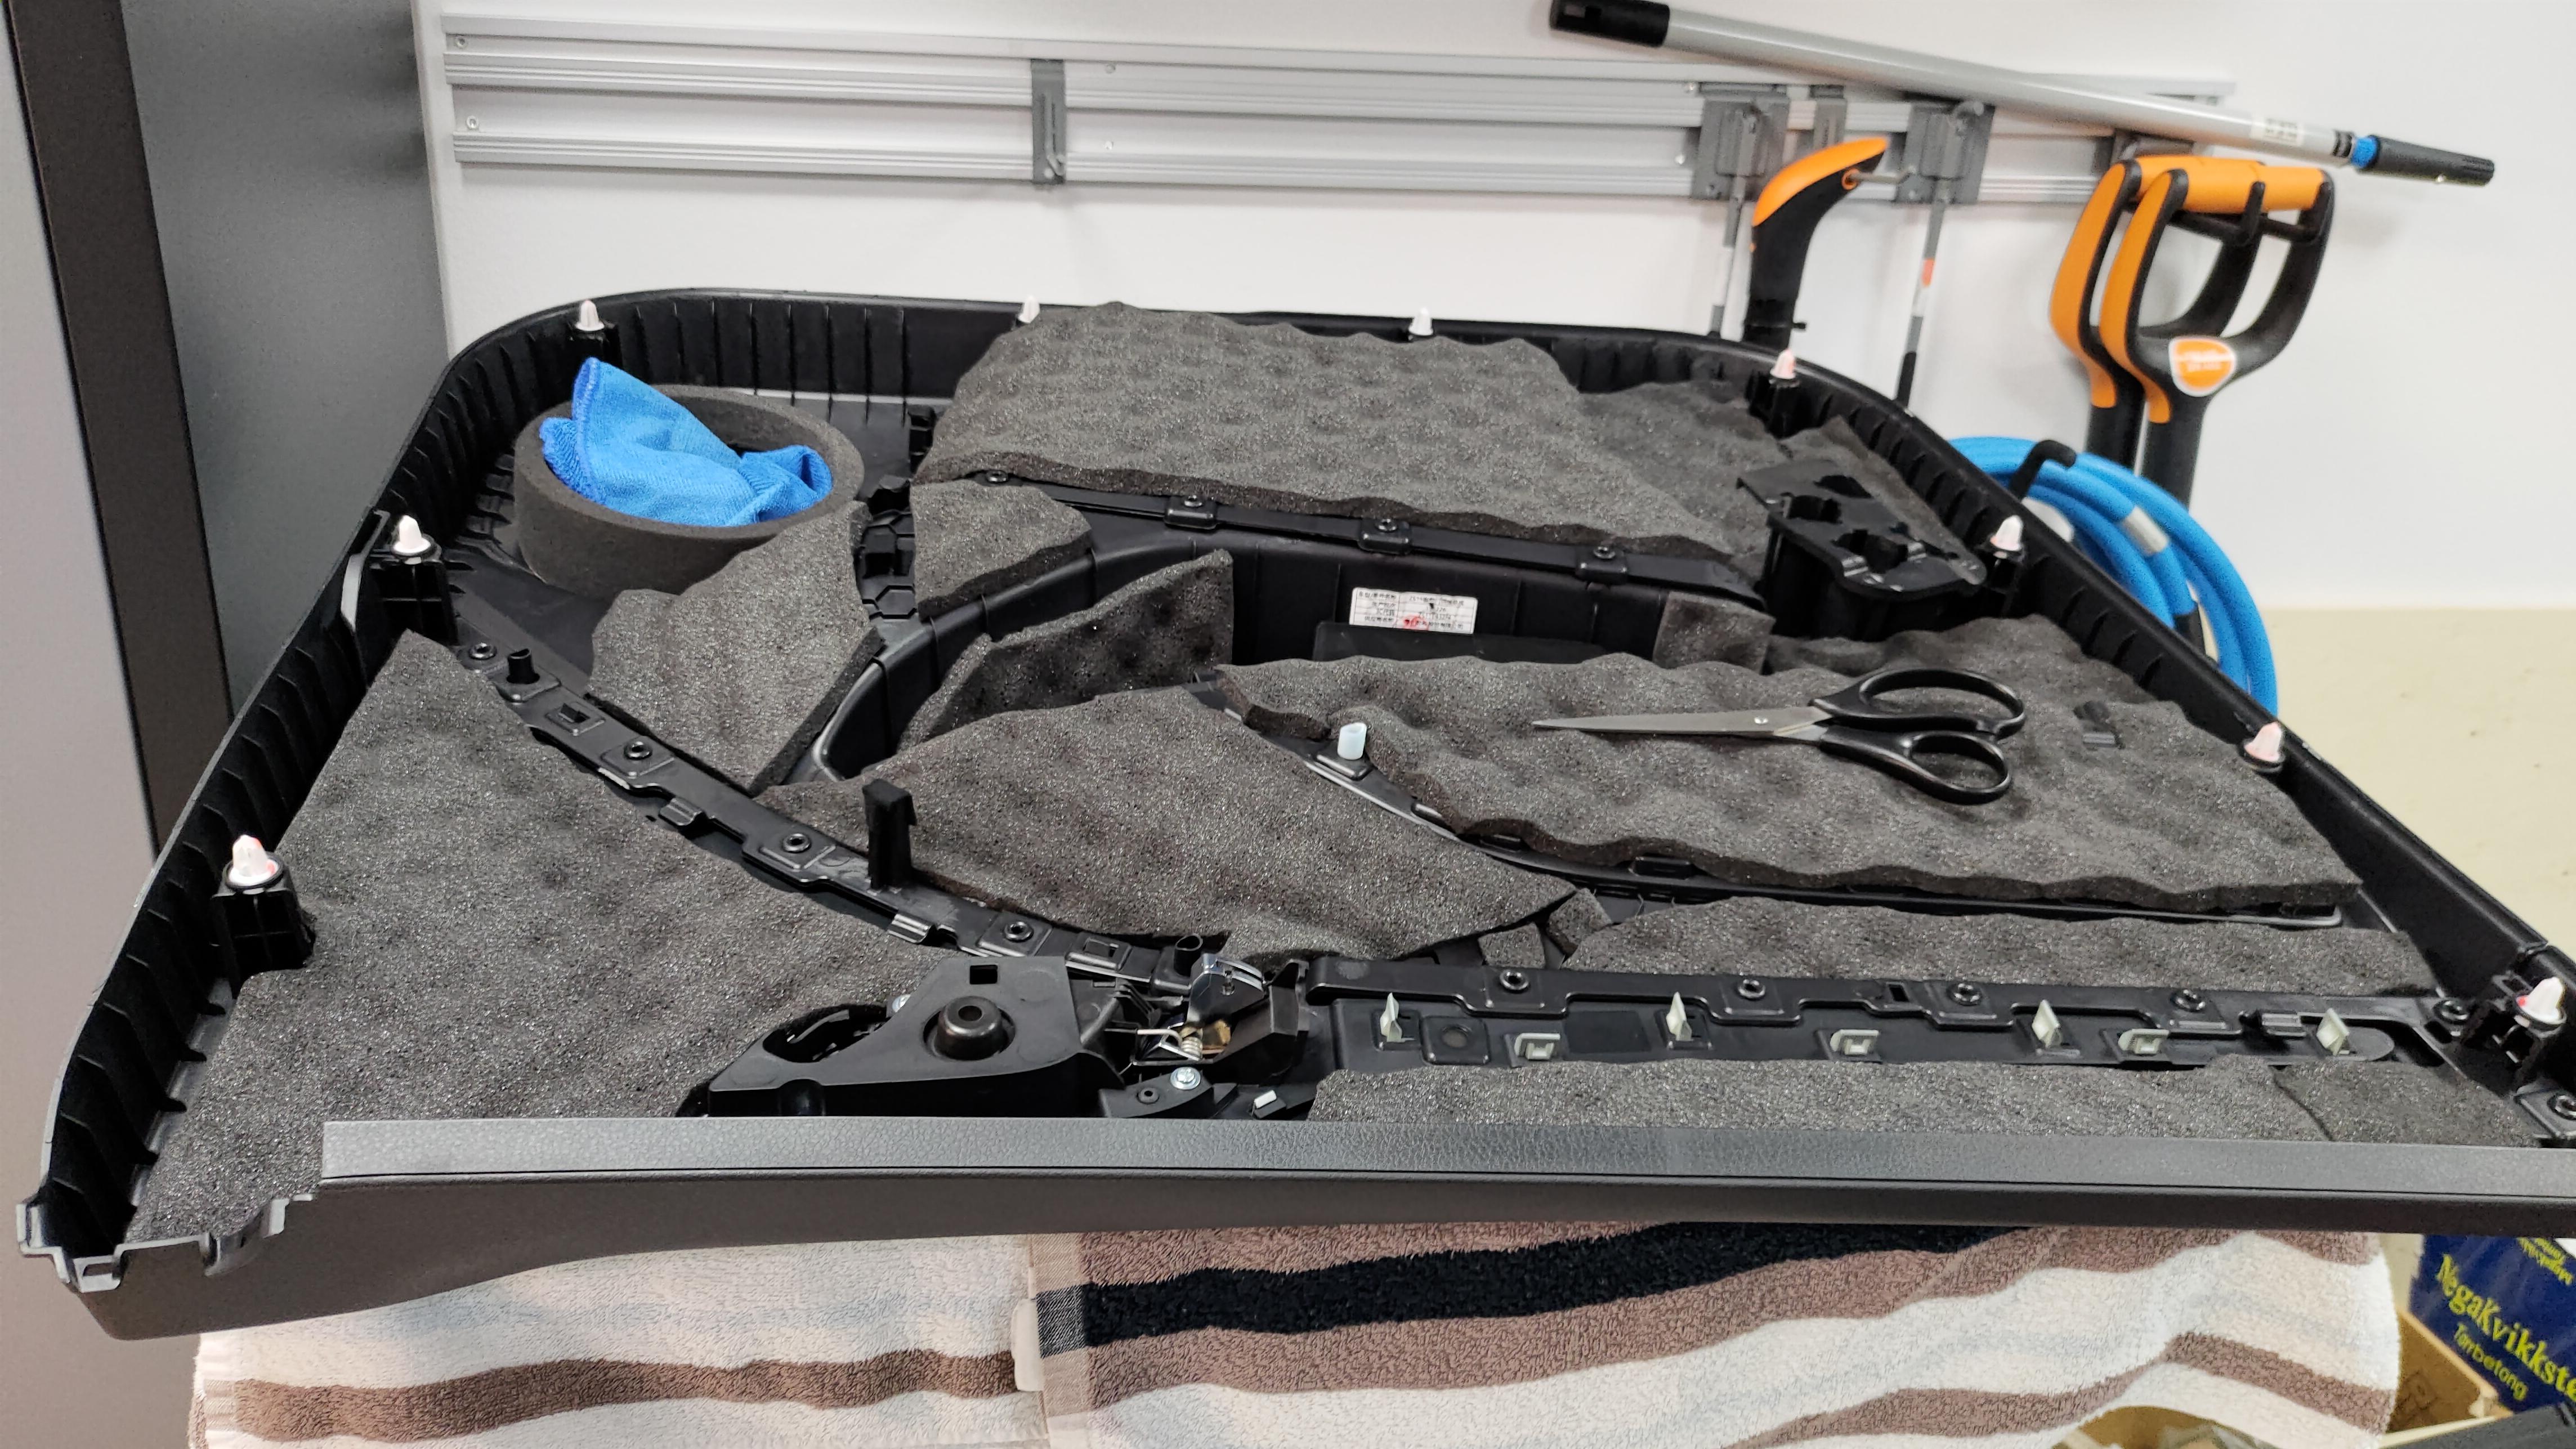
I don't have any pics, but there is a little cut-out where the backseat belt is attached, tha'ts where I was able to pull the subwoofer cable throught and feed it under the cover behind the back seats. I picked the largest subwoofer so I had to remove the styrofoam piece which is neatly displaying the emergency tools and charger. But the trunk cover still fits on the top level.
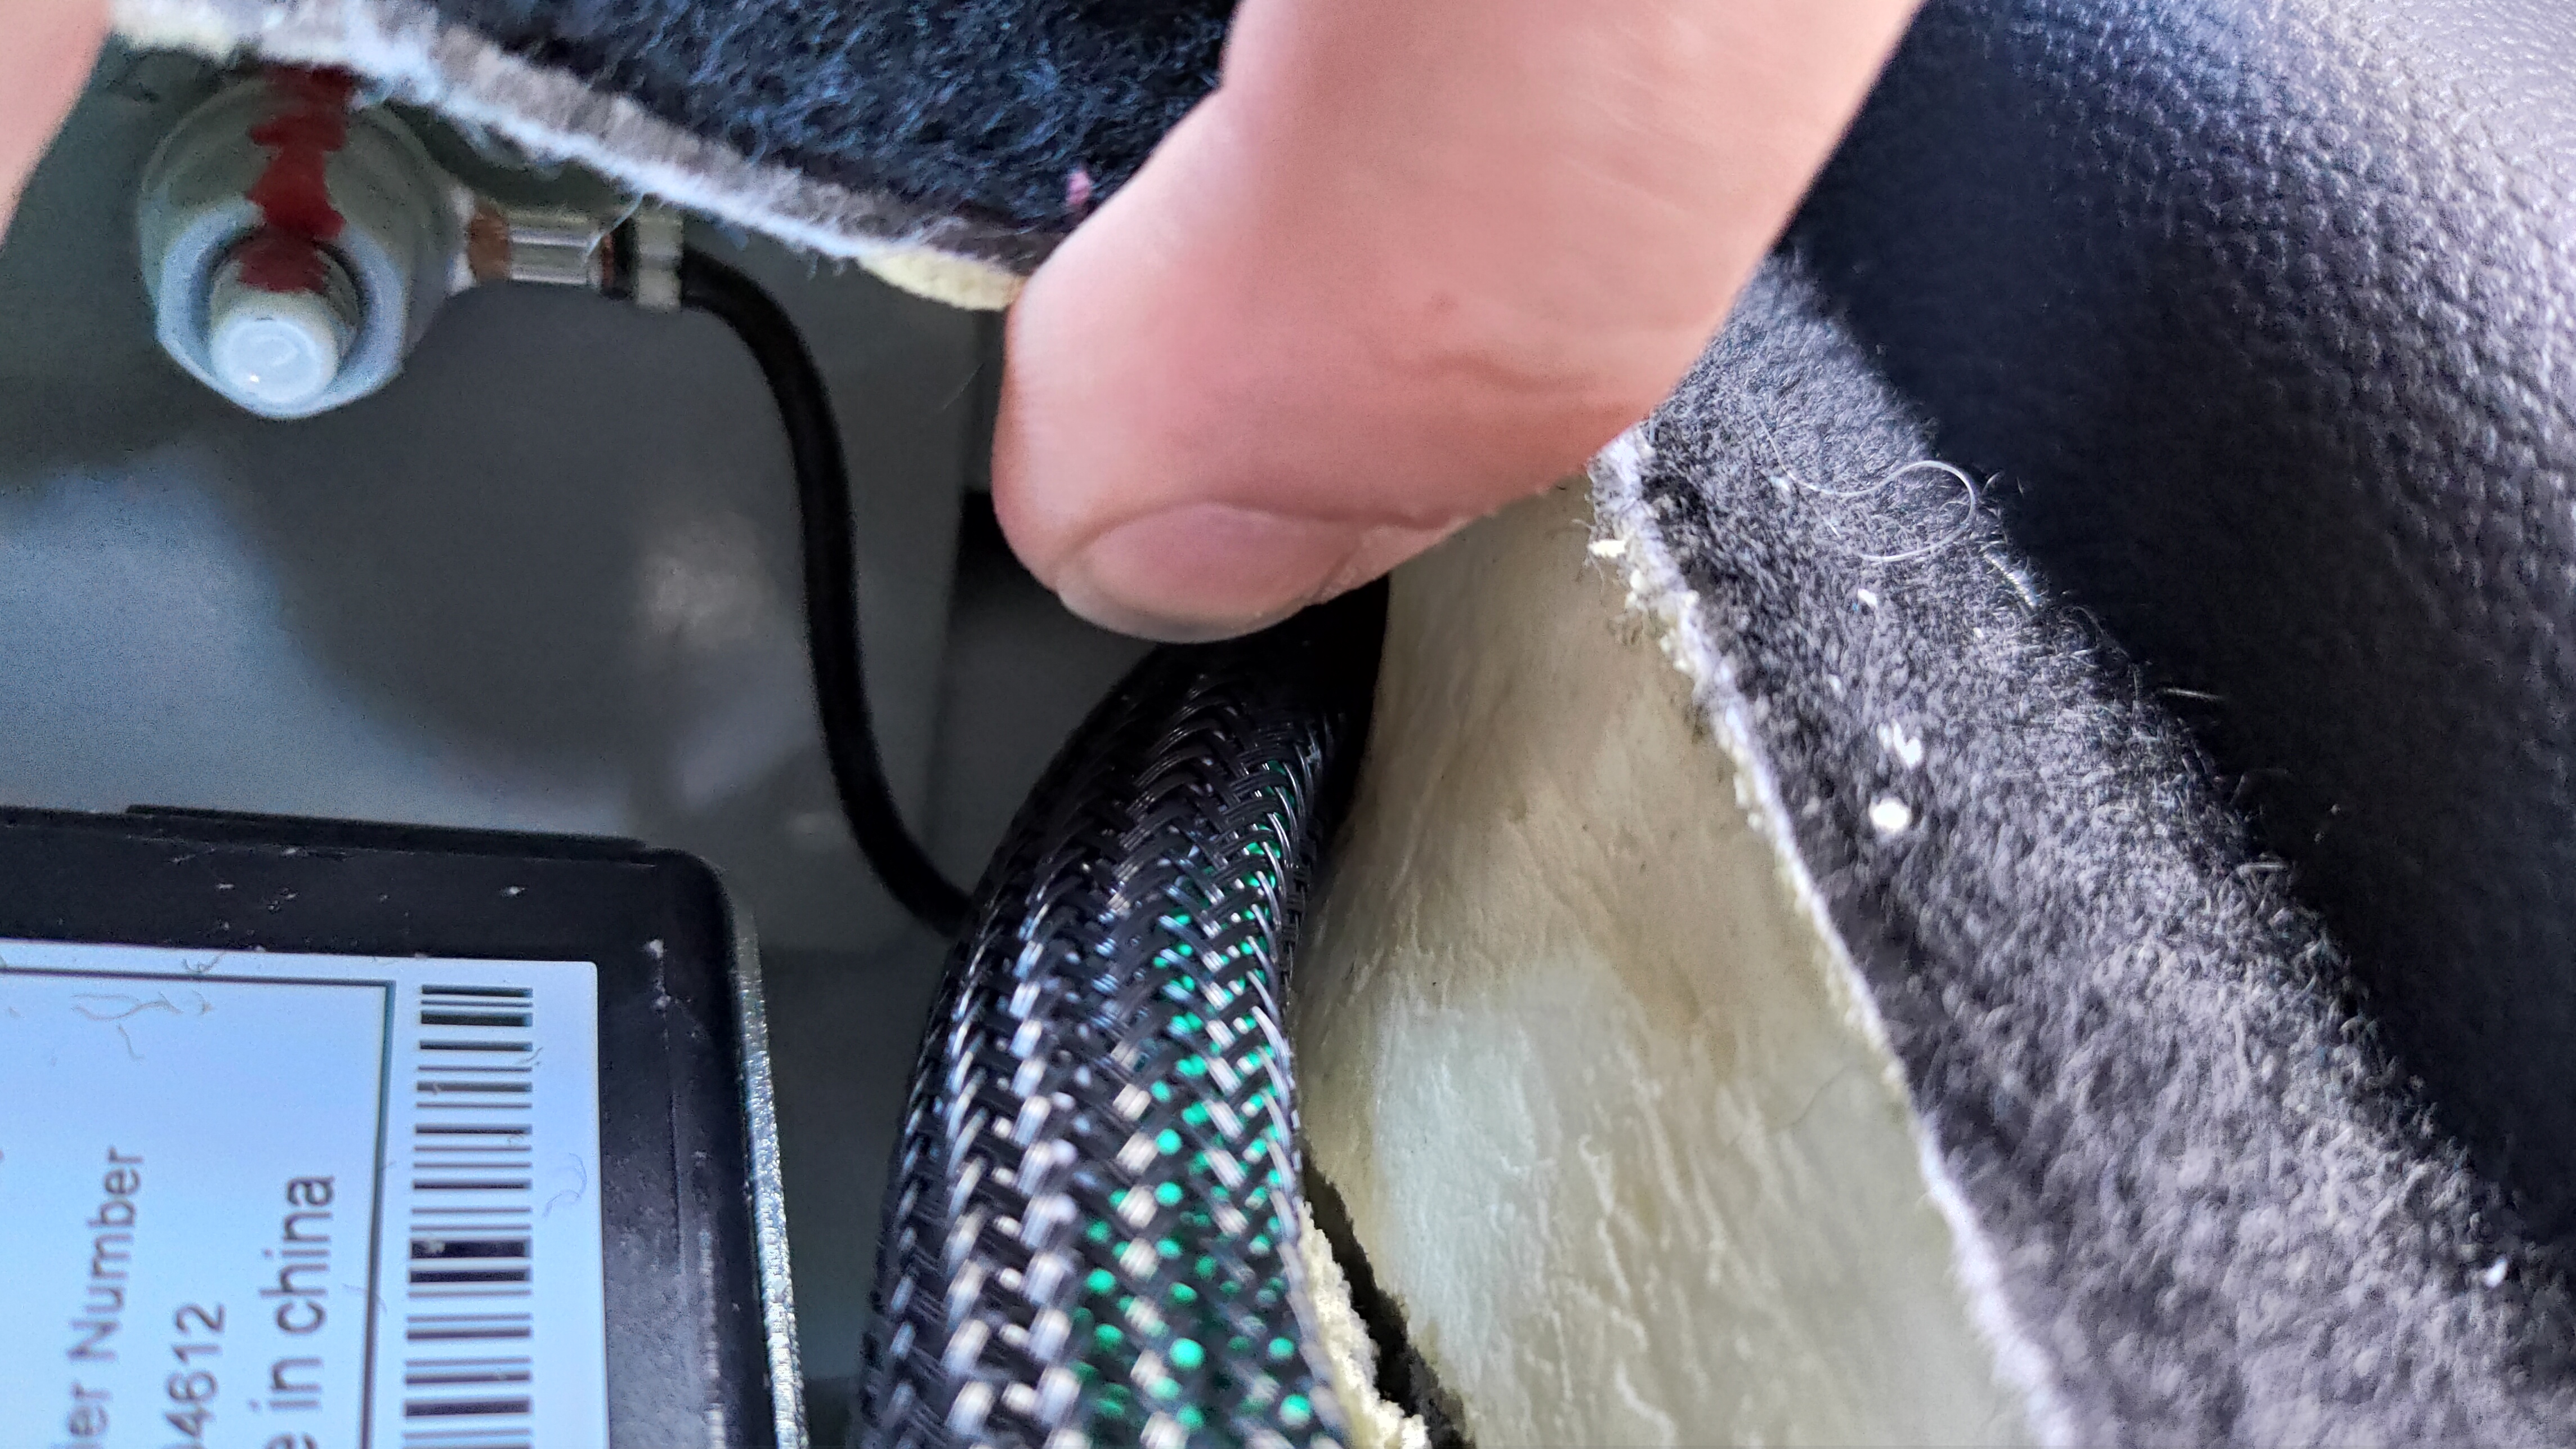
This is where my cable on the "inside" of the carpet enters and you can also see an incredible convenient location for bolting on the GND wire.
This is with the corner panel off, it was really tricky to pull off but just be firm and gentle and it will eventually give out. Both clips were still on the chassis after pulling it off.
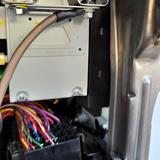
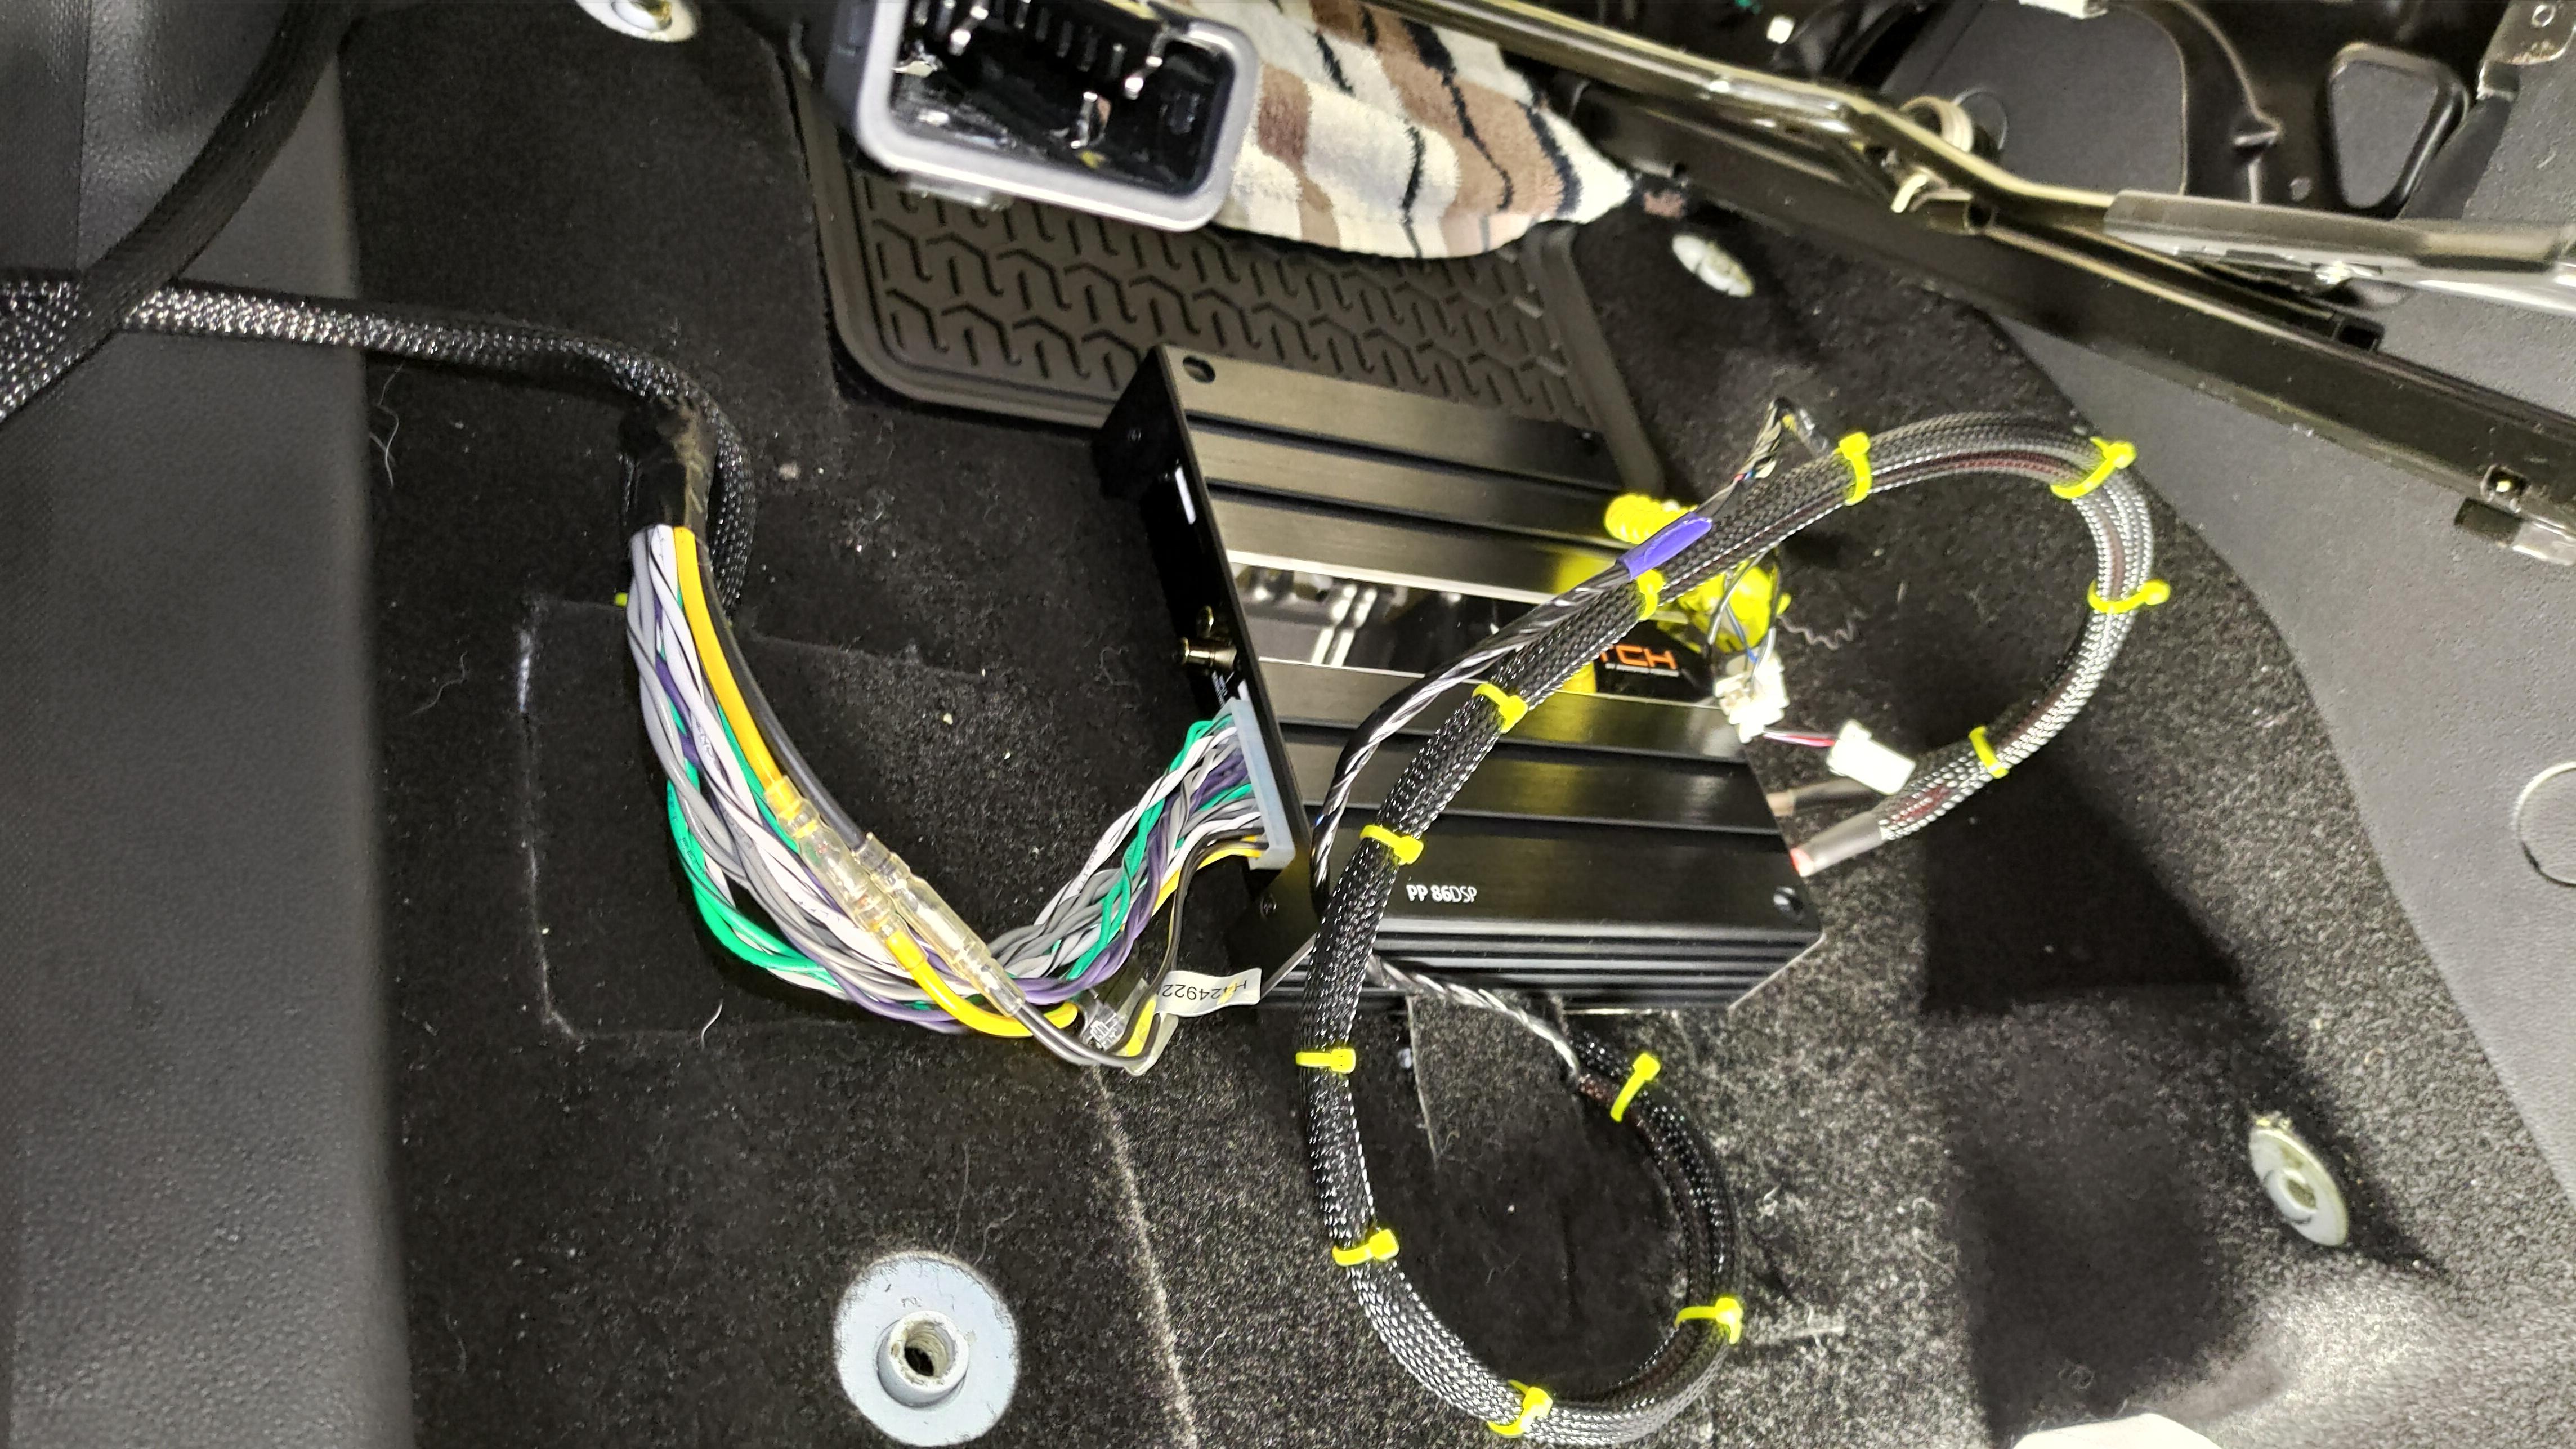
This is the result for the install so far. There are already cutouts for cables to the chair and also a semi cutout for some box which was easy to use. I secured the amp with some simple velcro underneath, its not sliding anywhere. I could also have planned better or trimmed the cables shorter but I kinda wanted ease of access to pull the amp out without disconnecting anything.
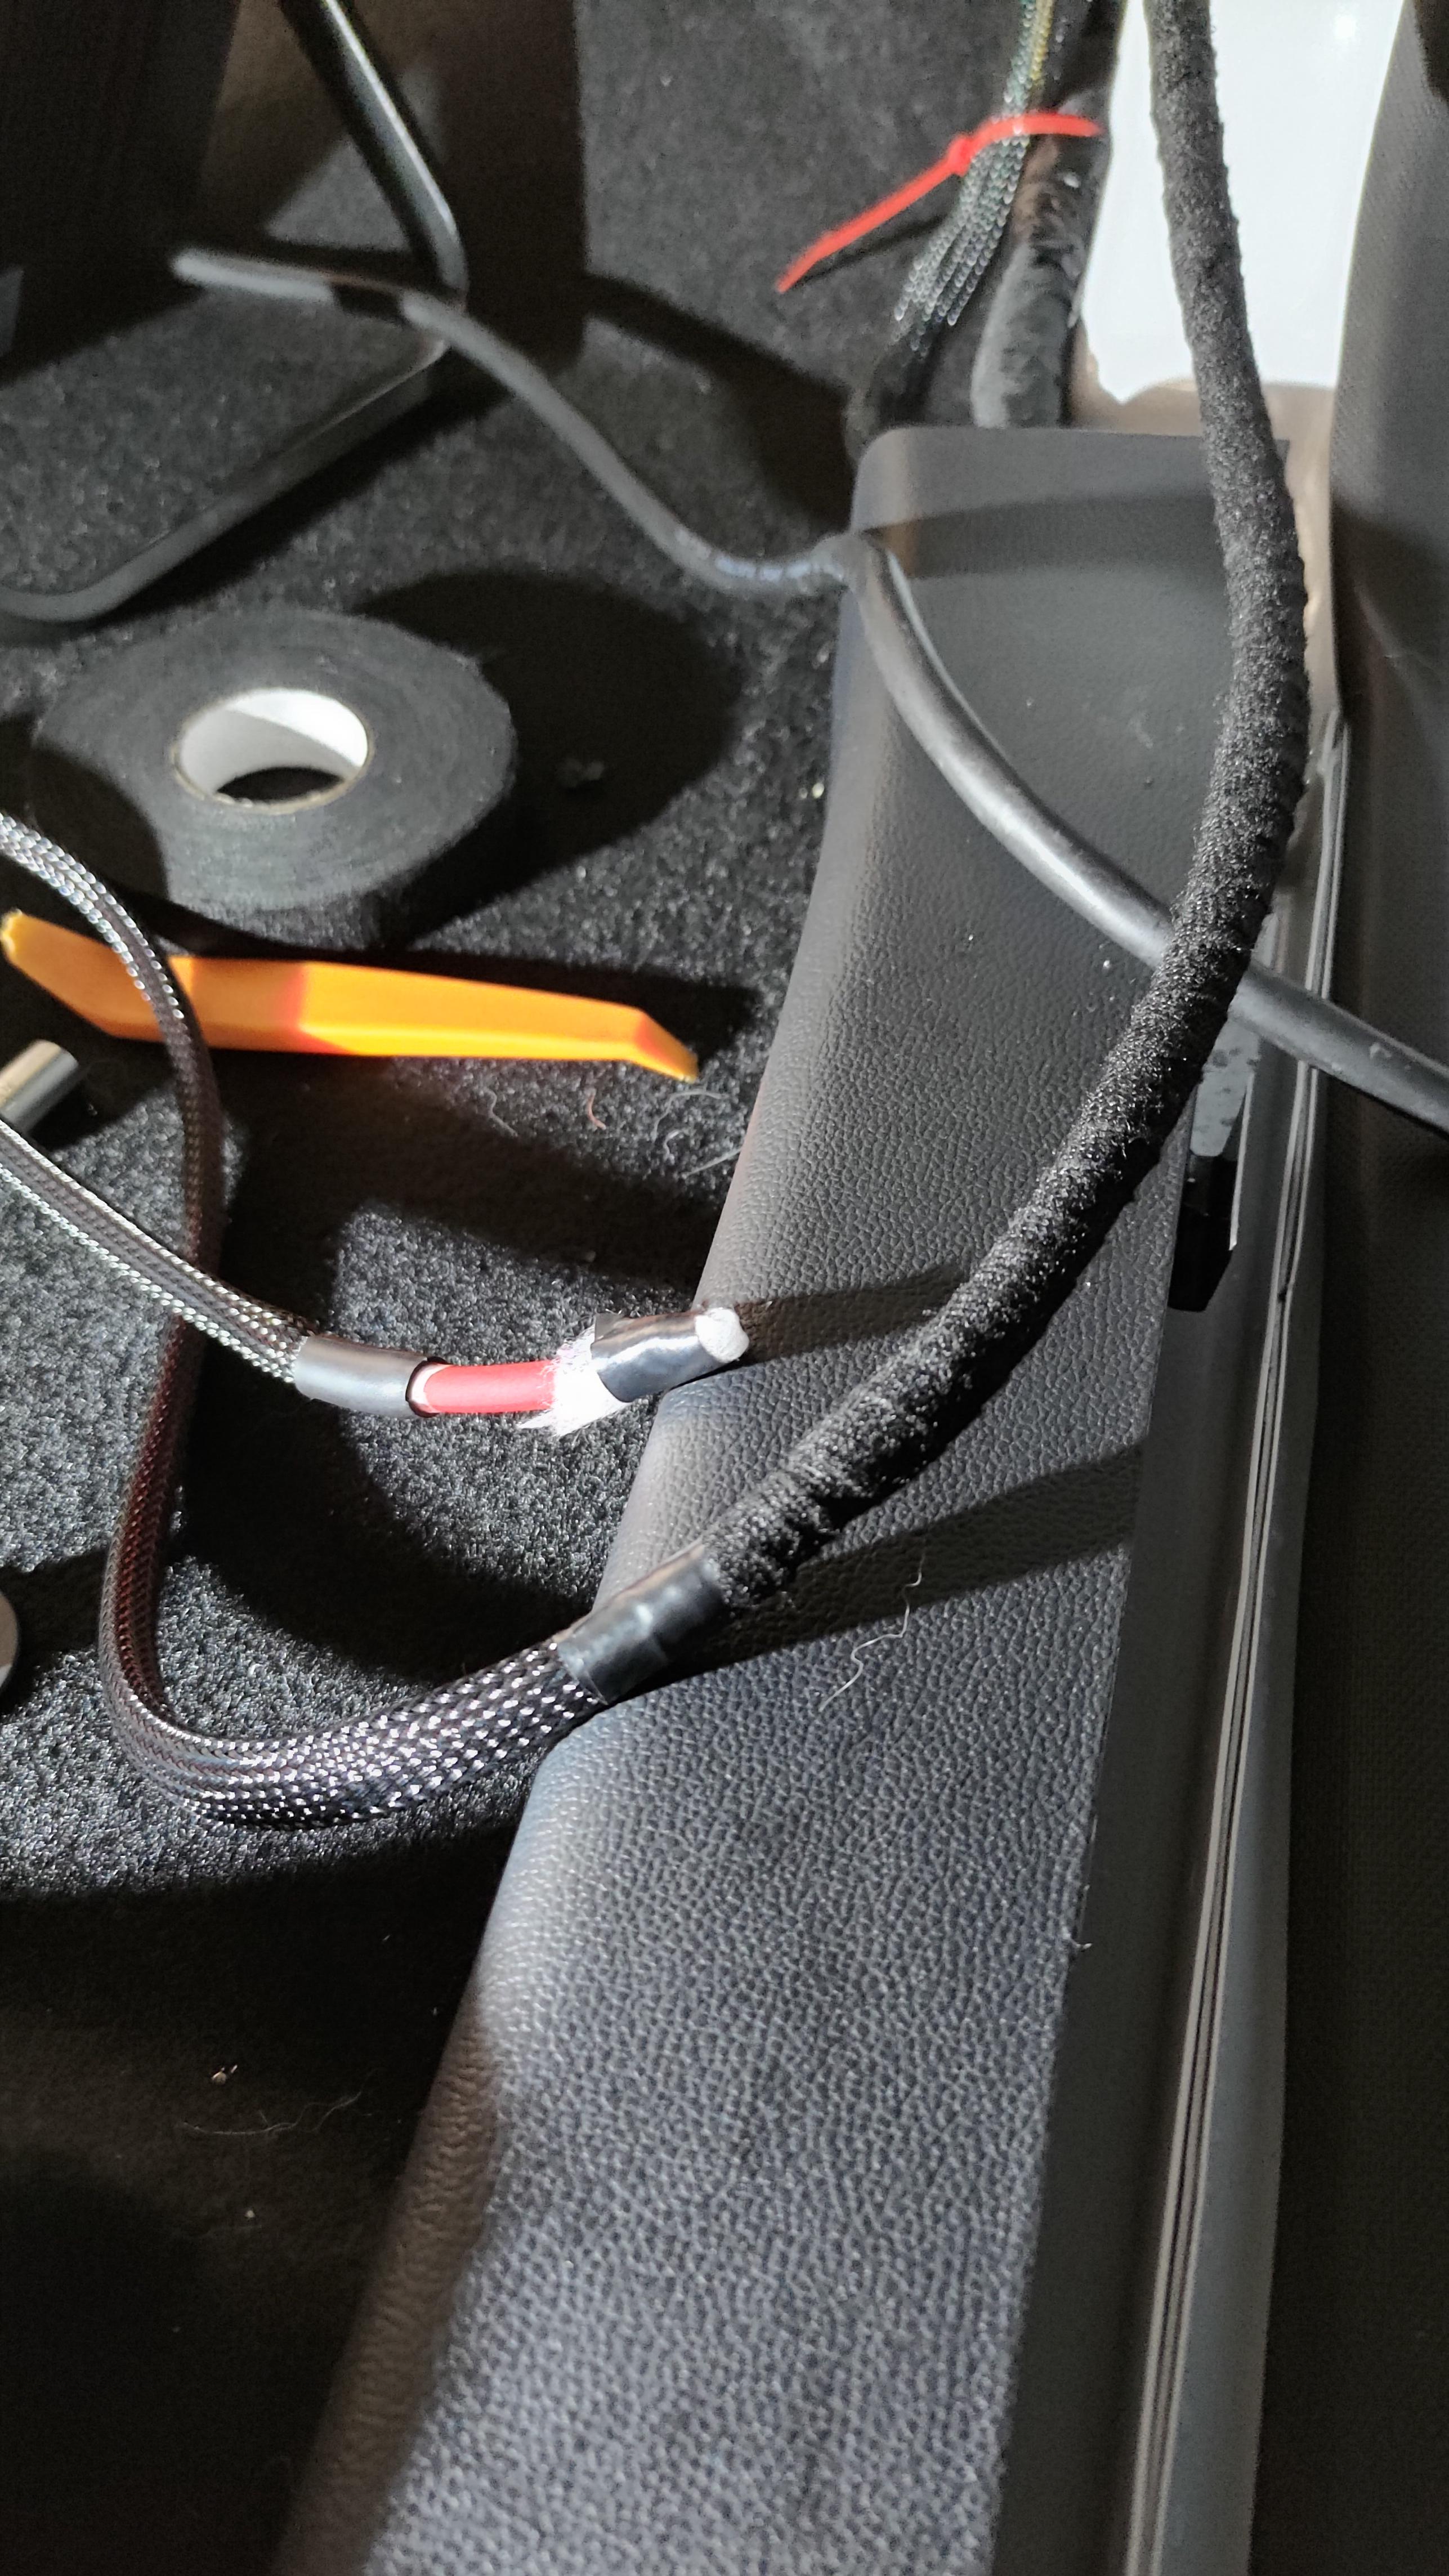
If anything I've learned from watching youtube, is that all cables should be protected or covered in fleecetape (soft fuzzy tape?) to reduce rattling. Here is example of my power cable covered in flex hose for protection and then covered the part which is exposed to movement in fleecetape.
This is how the (now sleeved) powercable is wired, make sure the cable goes down from the gasket and then up to make a loop which makes eventual any water run away from the gasket. I'll 3d print some plastic eventually to make a pretty platform for the fuseholder to attach to.
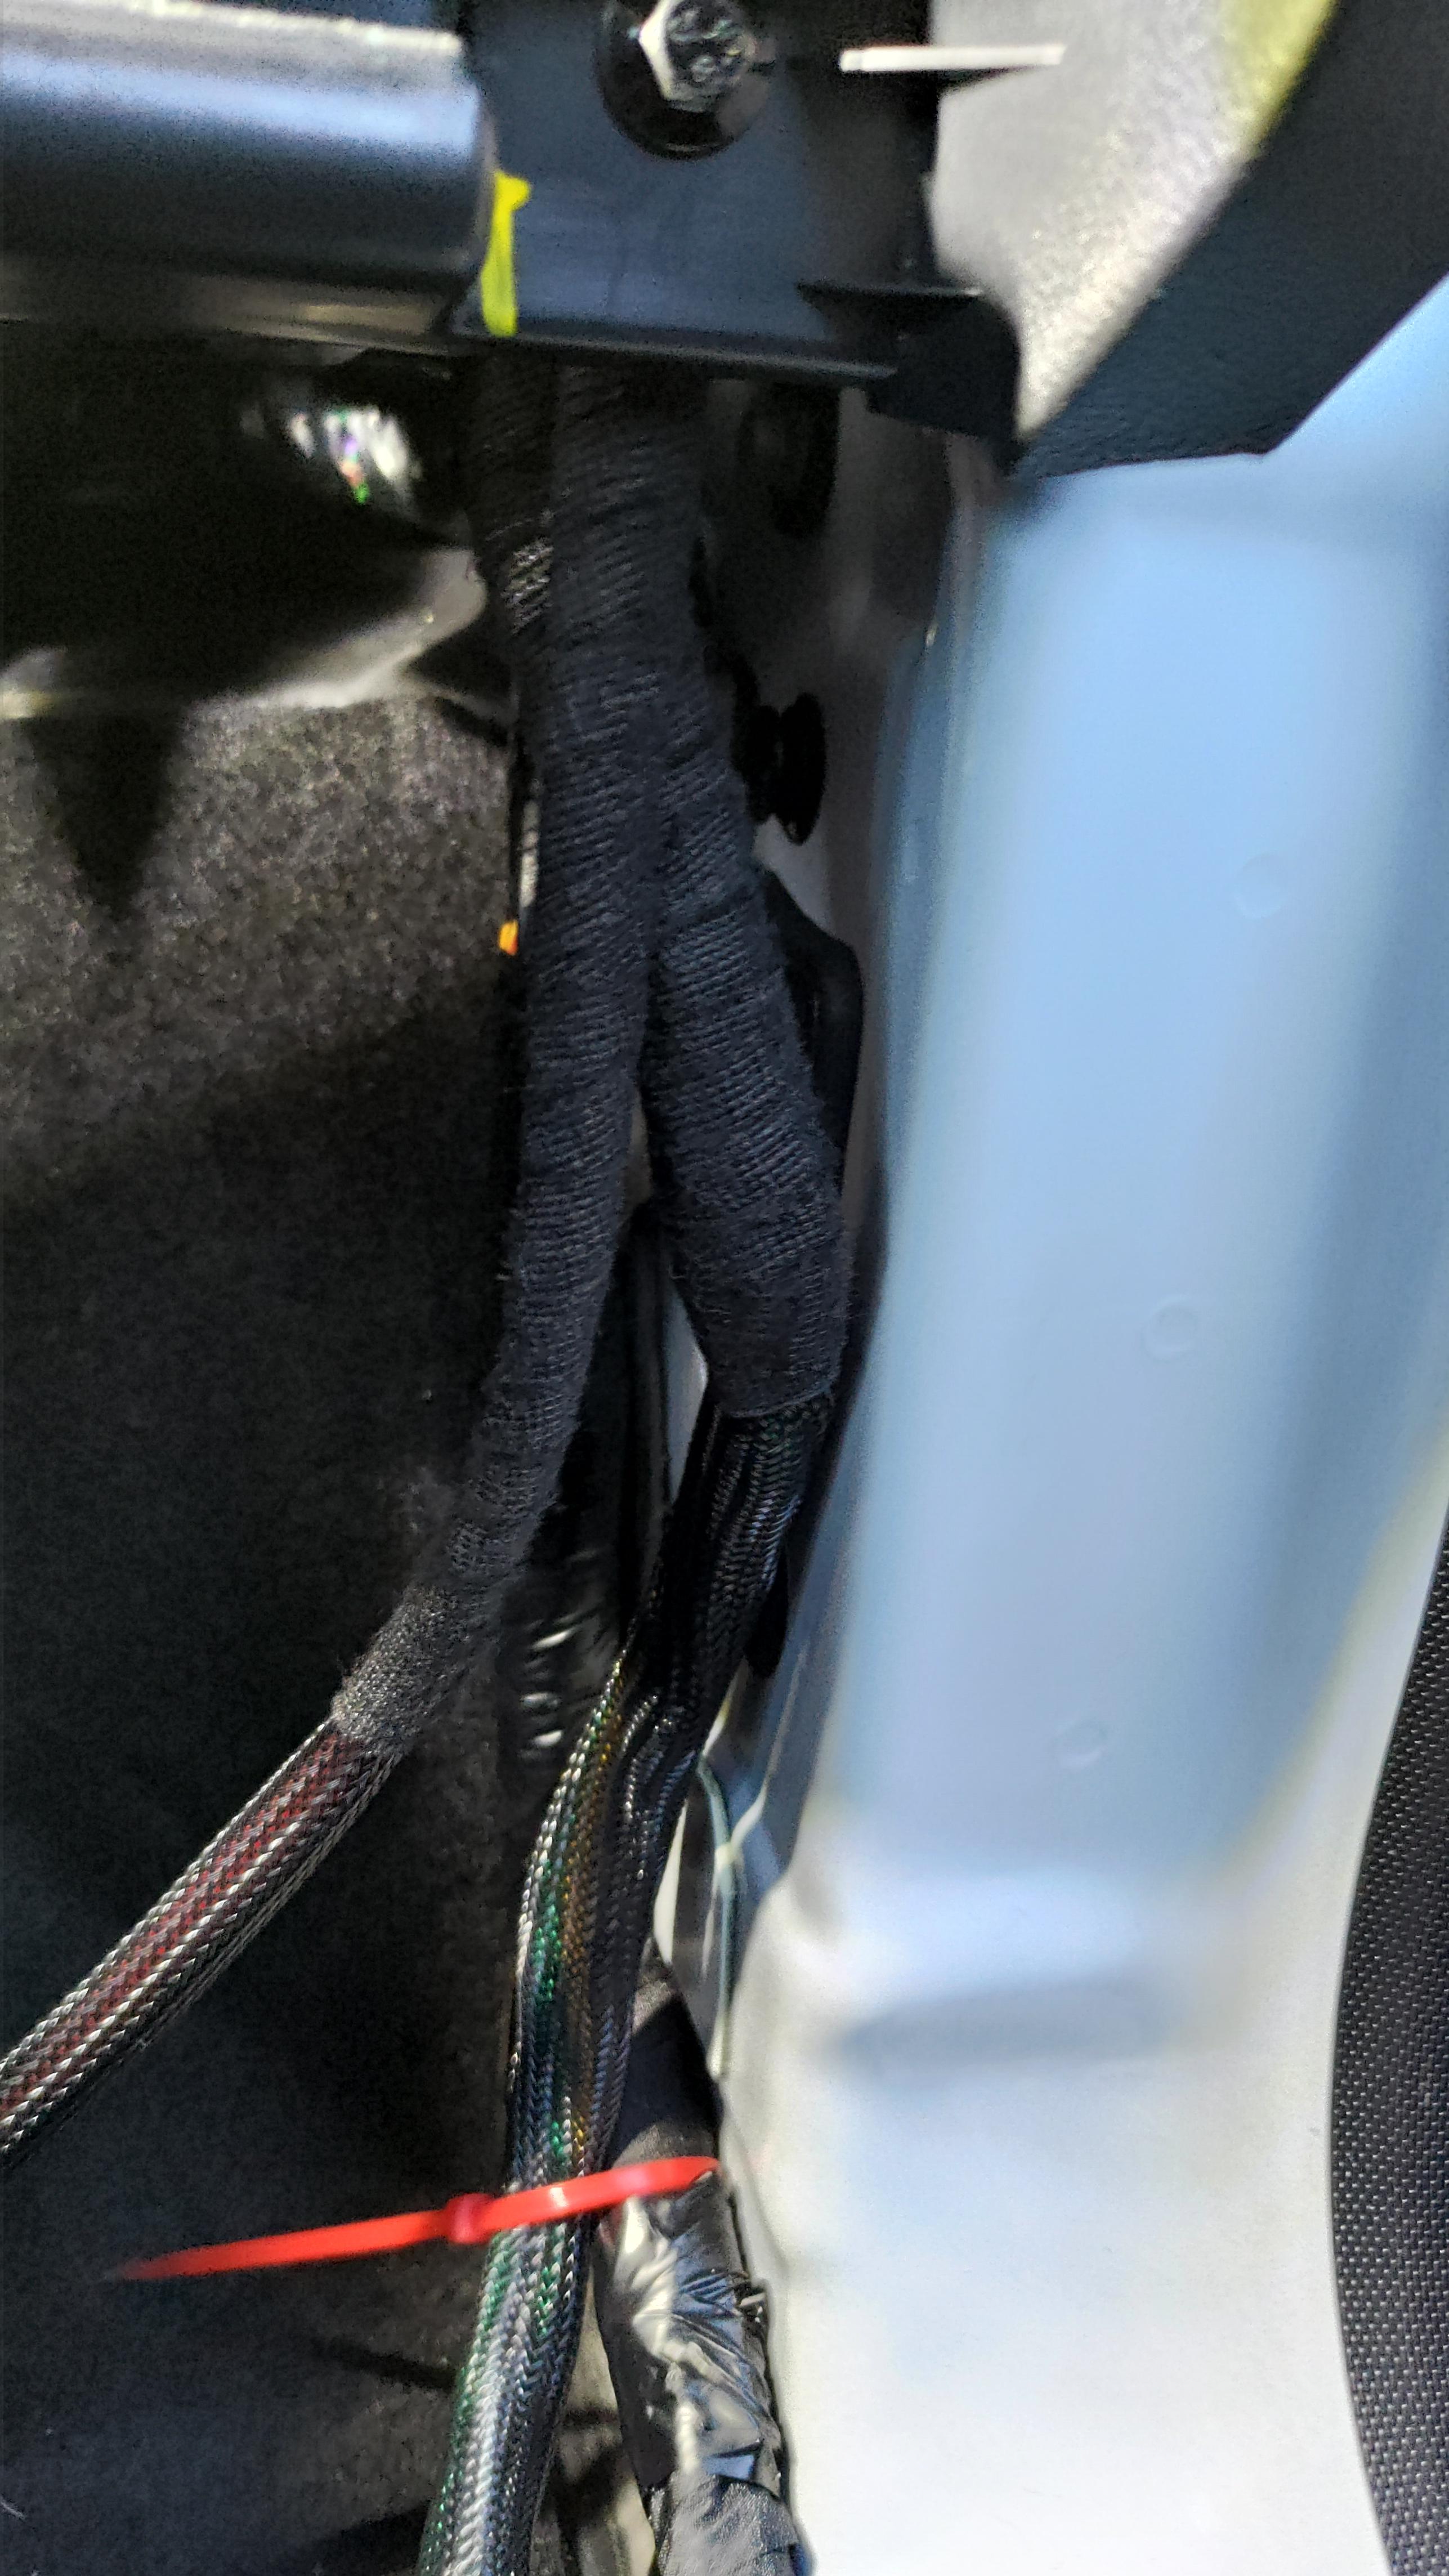
Now on to the speaker install. To my discovery there isn't a hole between the gasket connecting the door to the main body of the car. There is in fact a connector in there. So that means I cannot put the crossover at the door, and it makes it hard to splice off any original cable cause everything is so well put together.

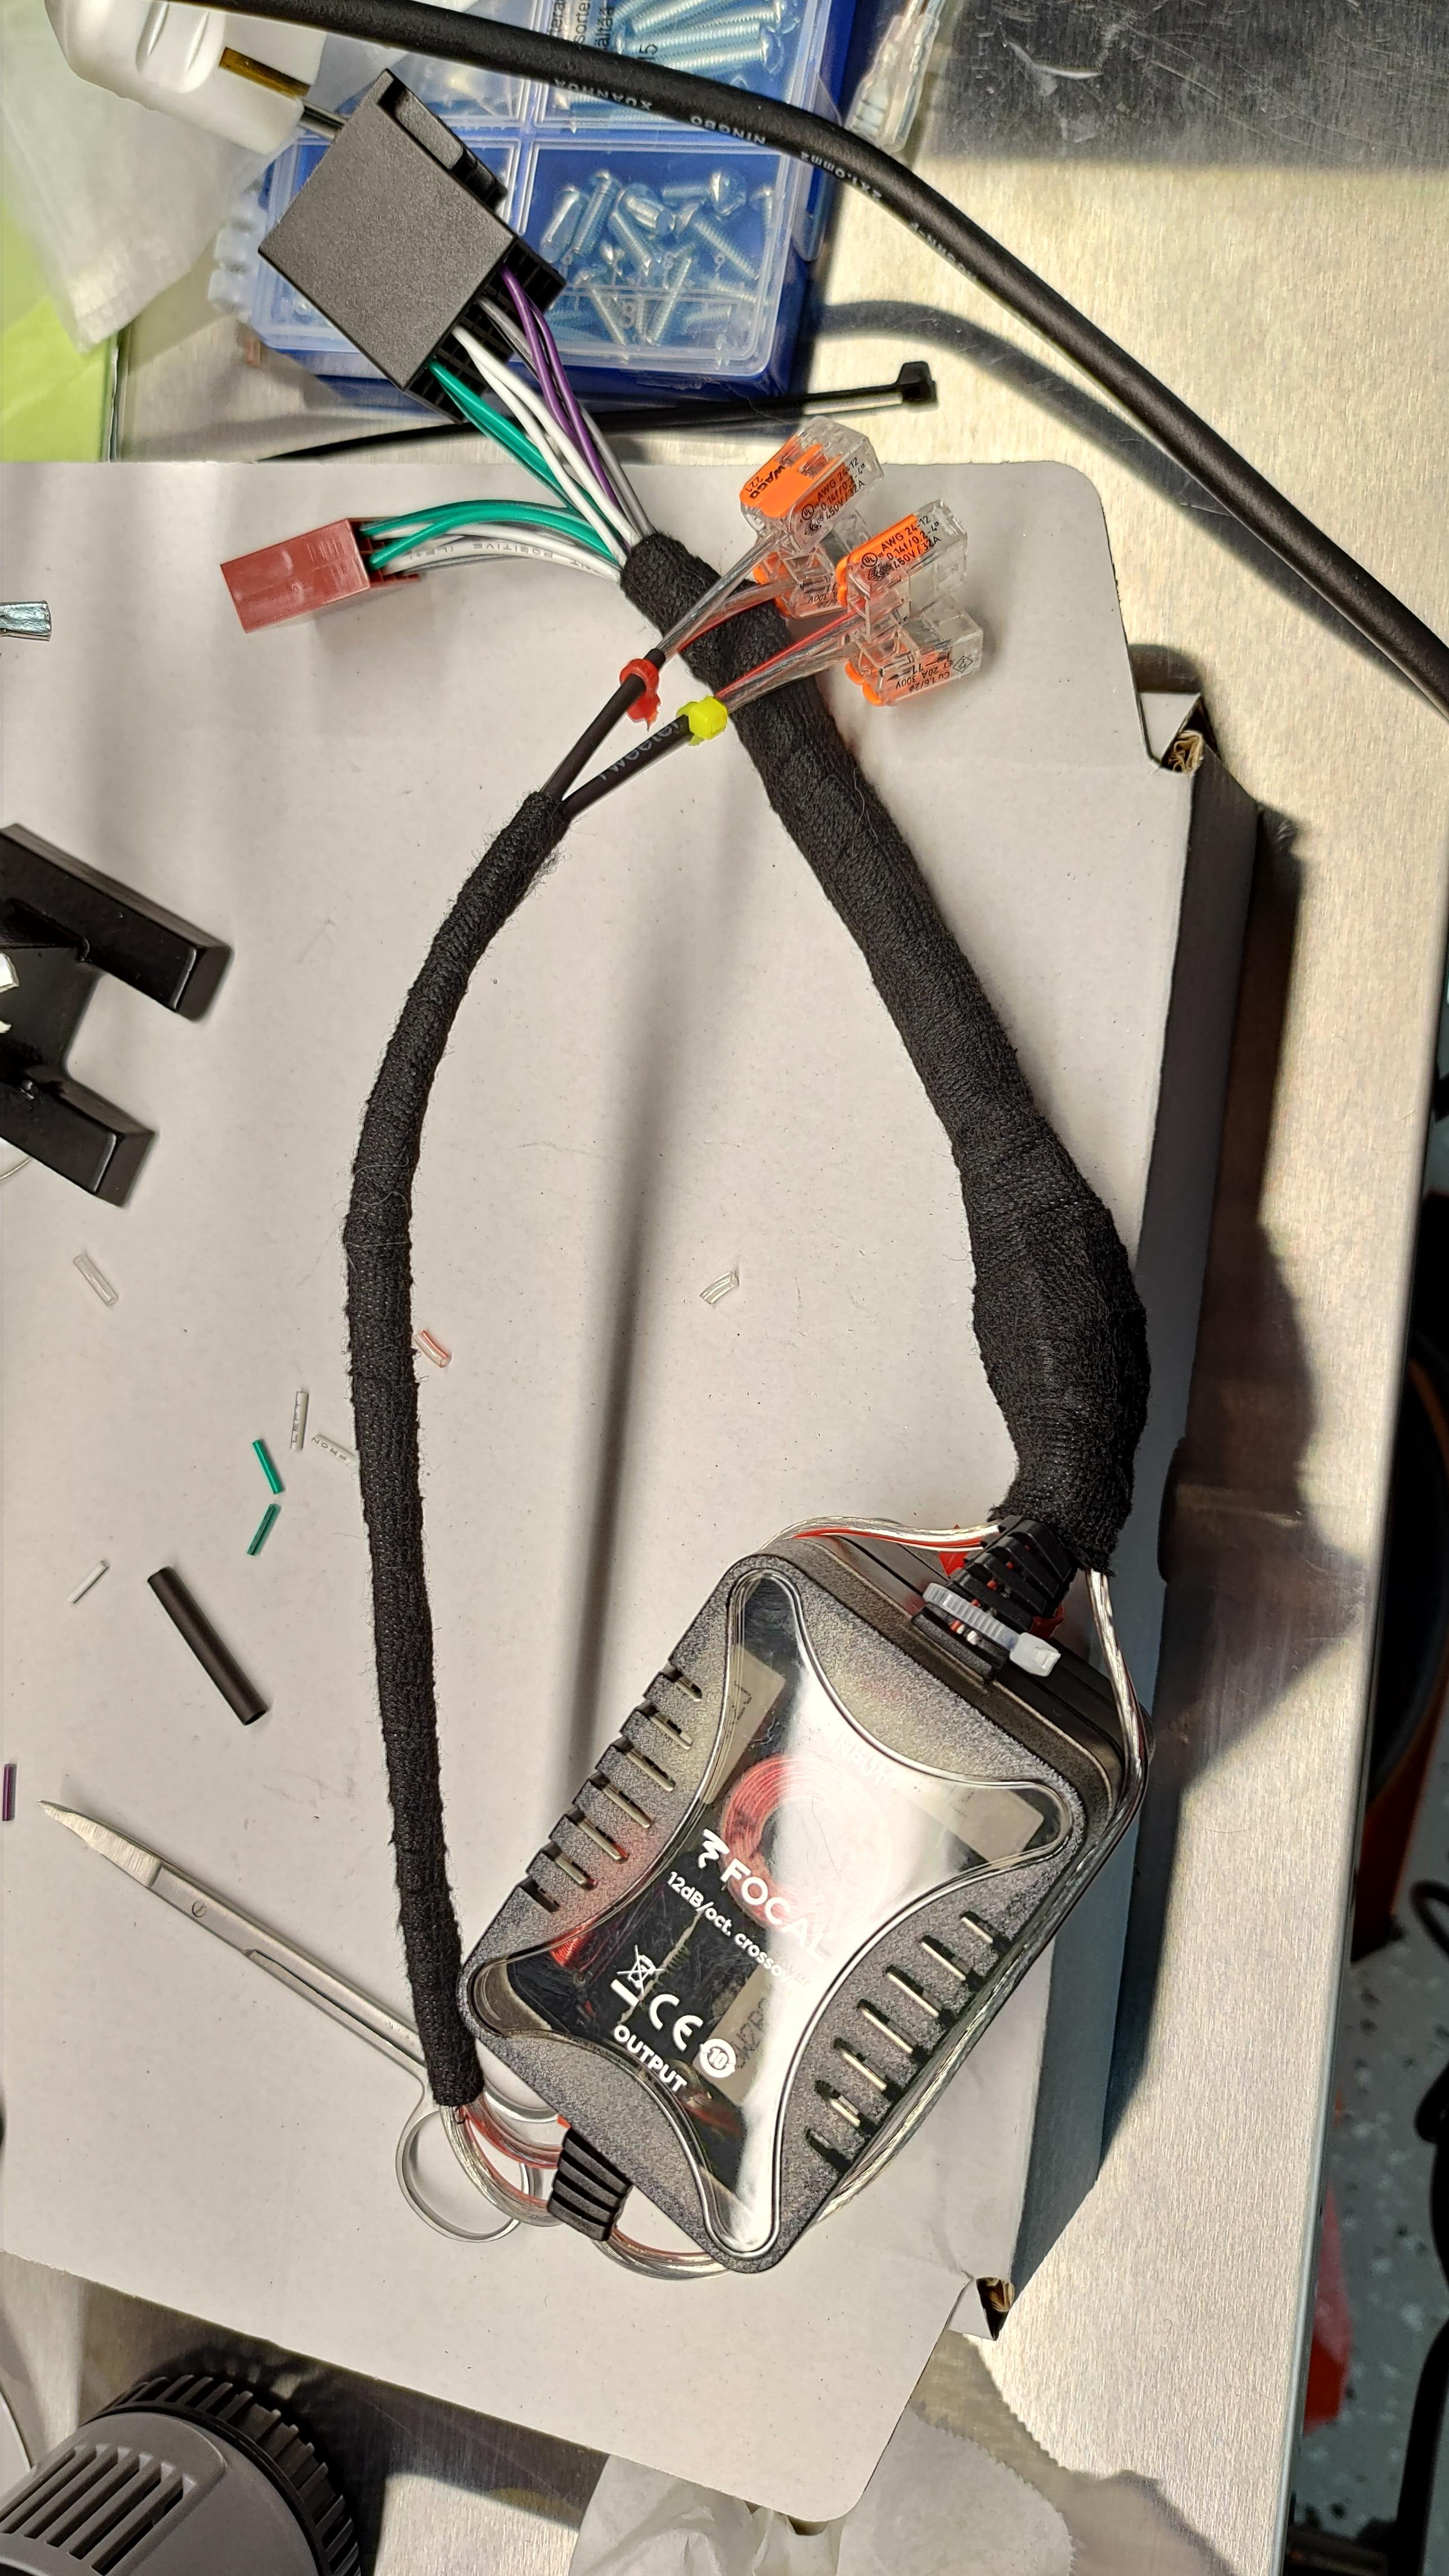
So therefore I had to make my crossovers as a cluster to wire into the harness behind the headunit. It connects between the amp and the stock harness. The door woofers can then use stock cables, and I can pull new speaker cables to the tweeters in the A-pillar and wire them to this abomination. The crossovers were wrapped into some speaker cloth material to make it lay soft and not rattling behind the head unit.
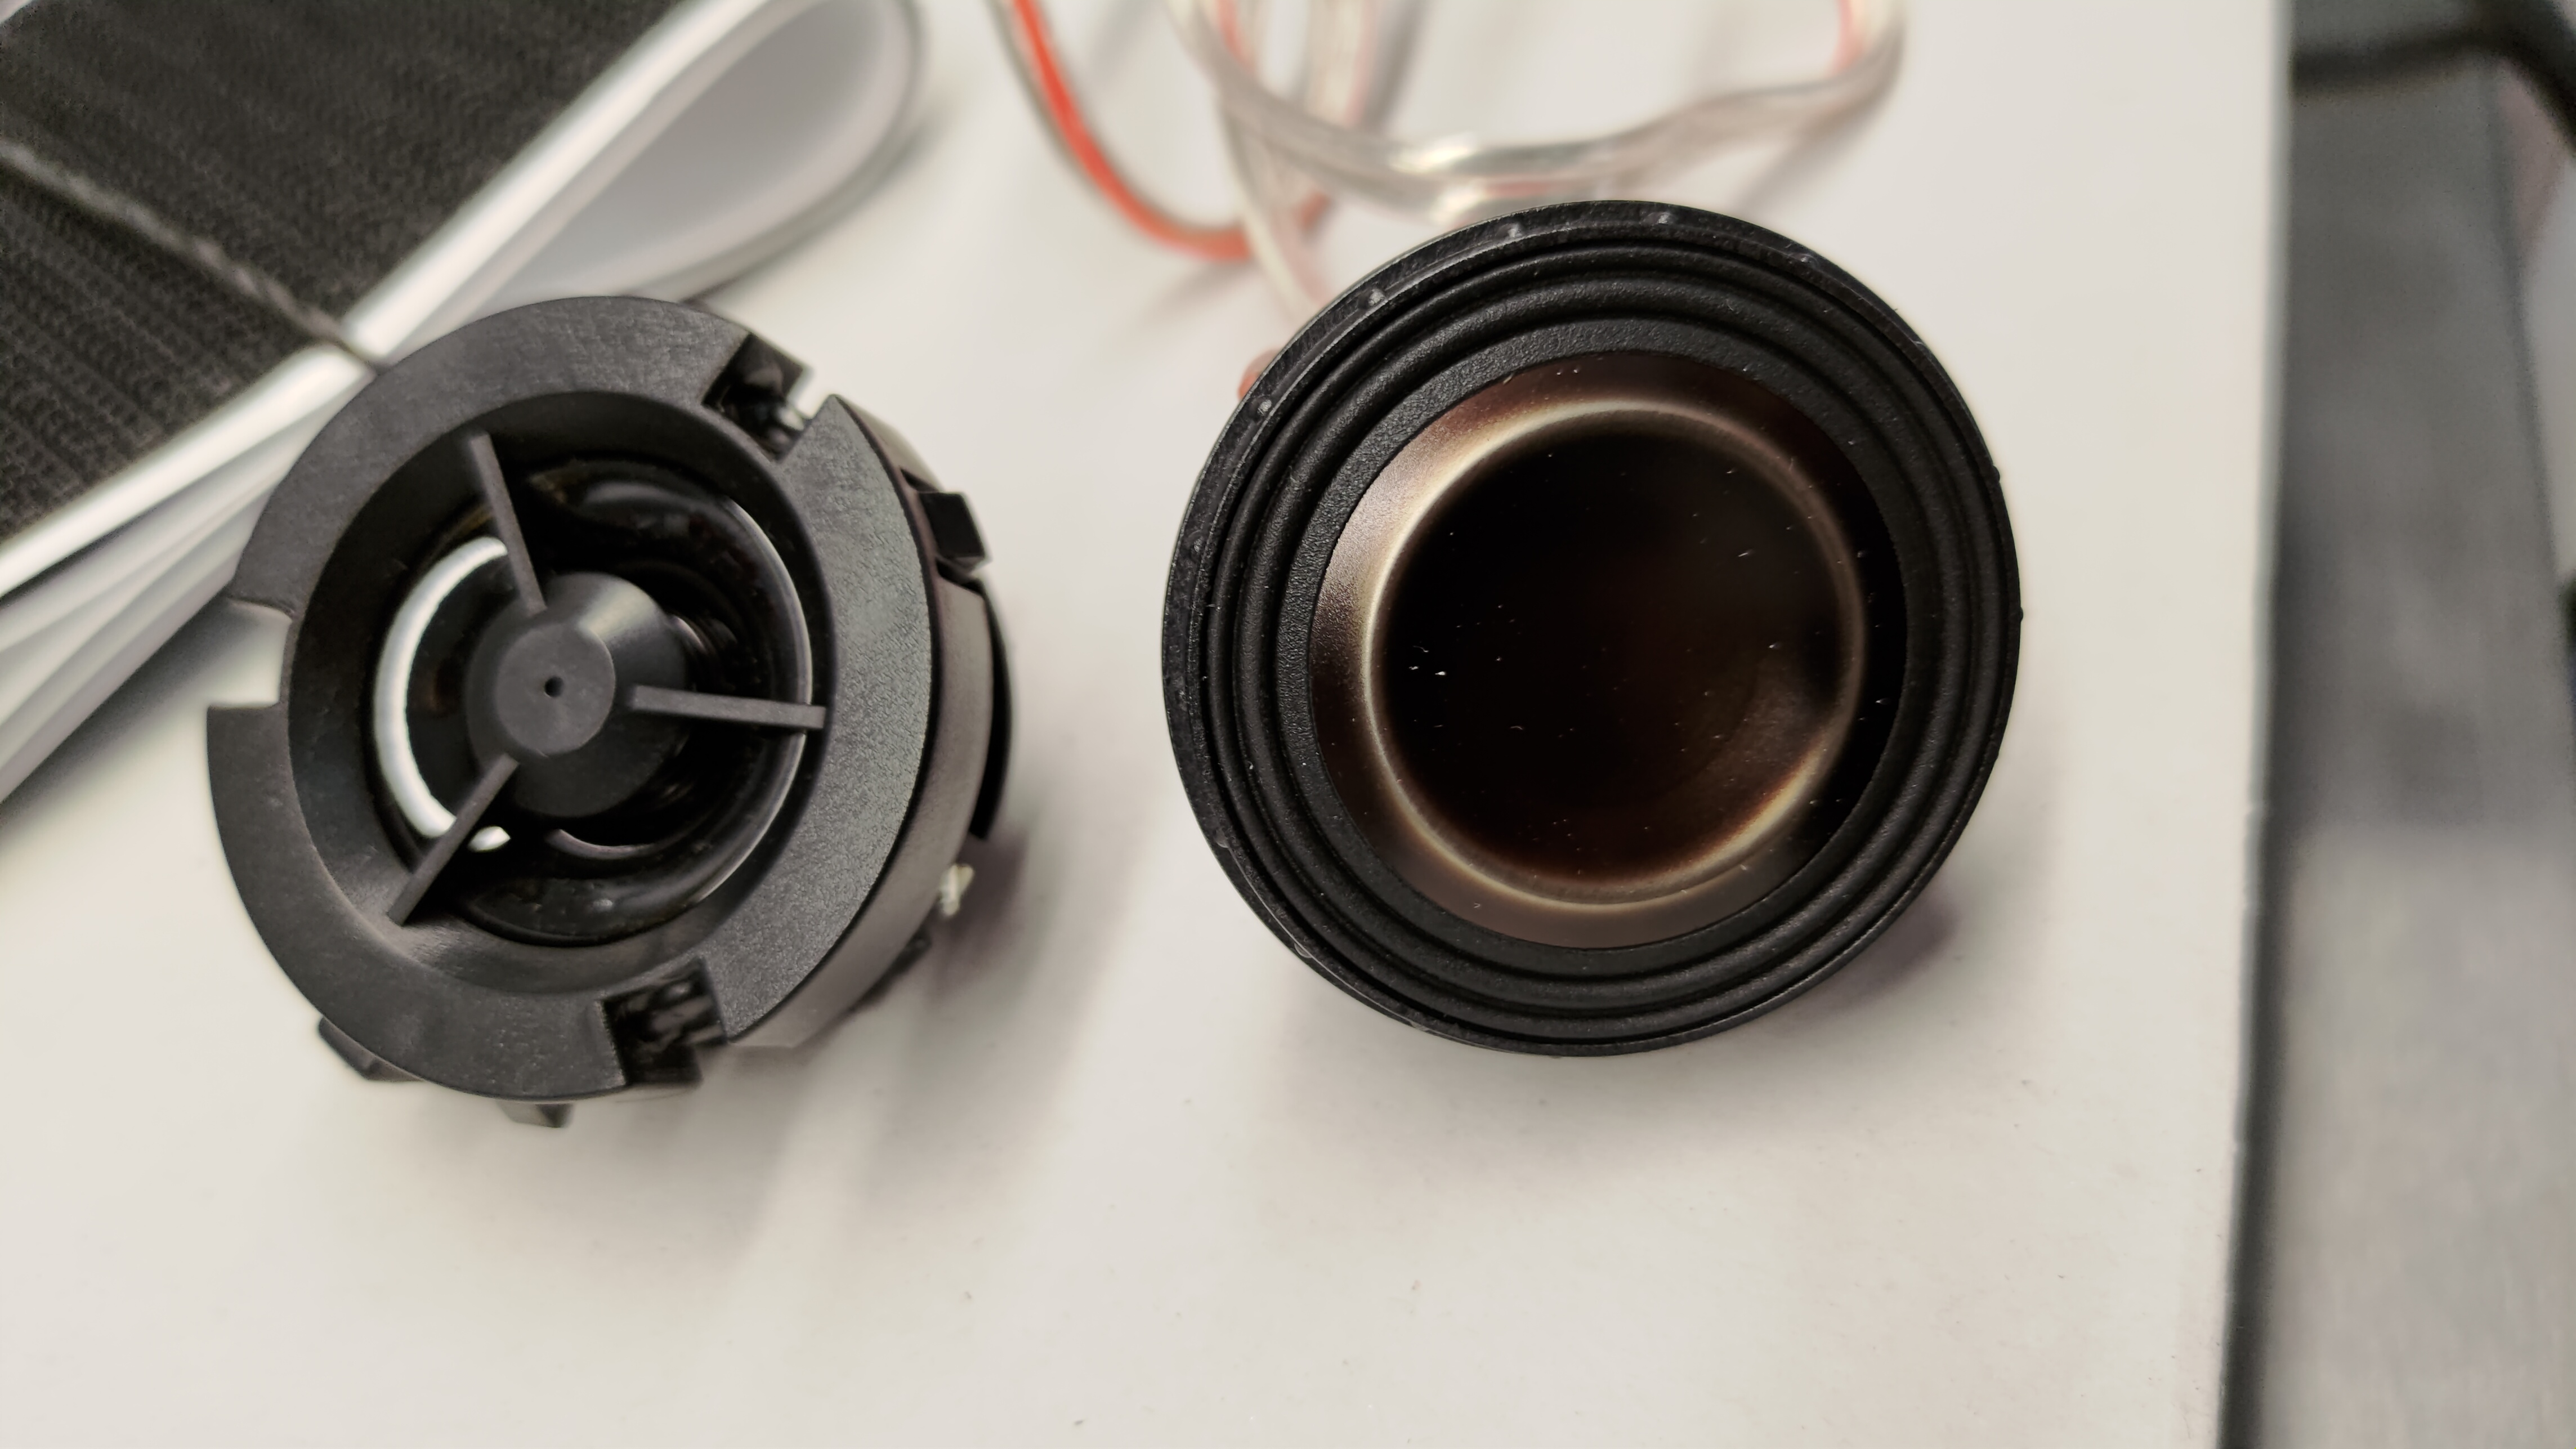
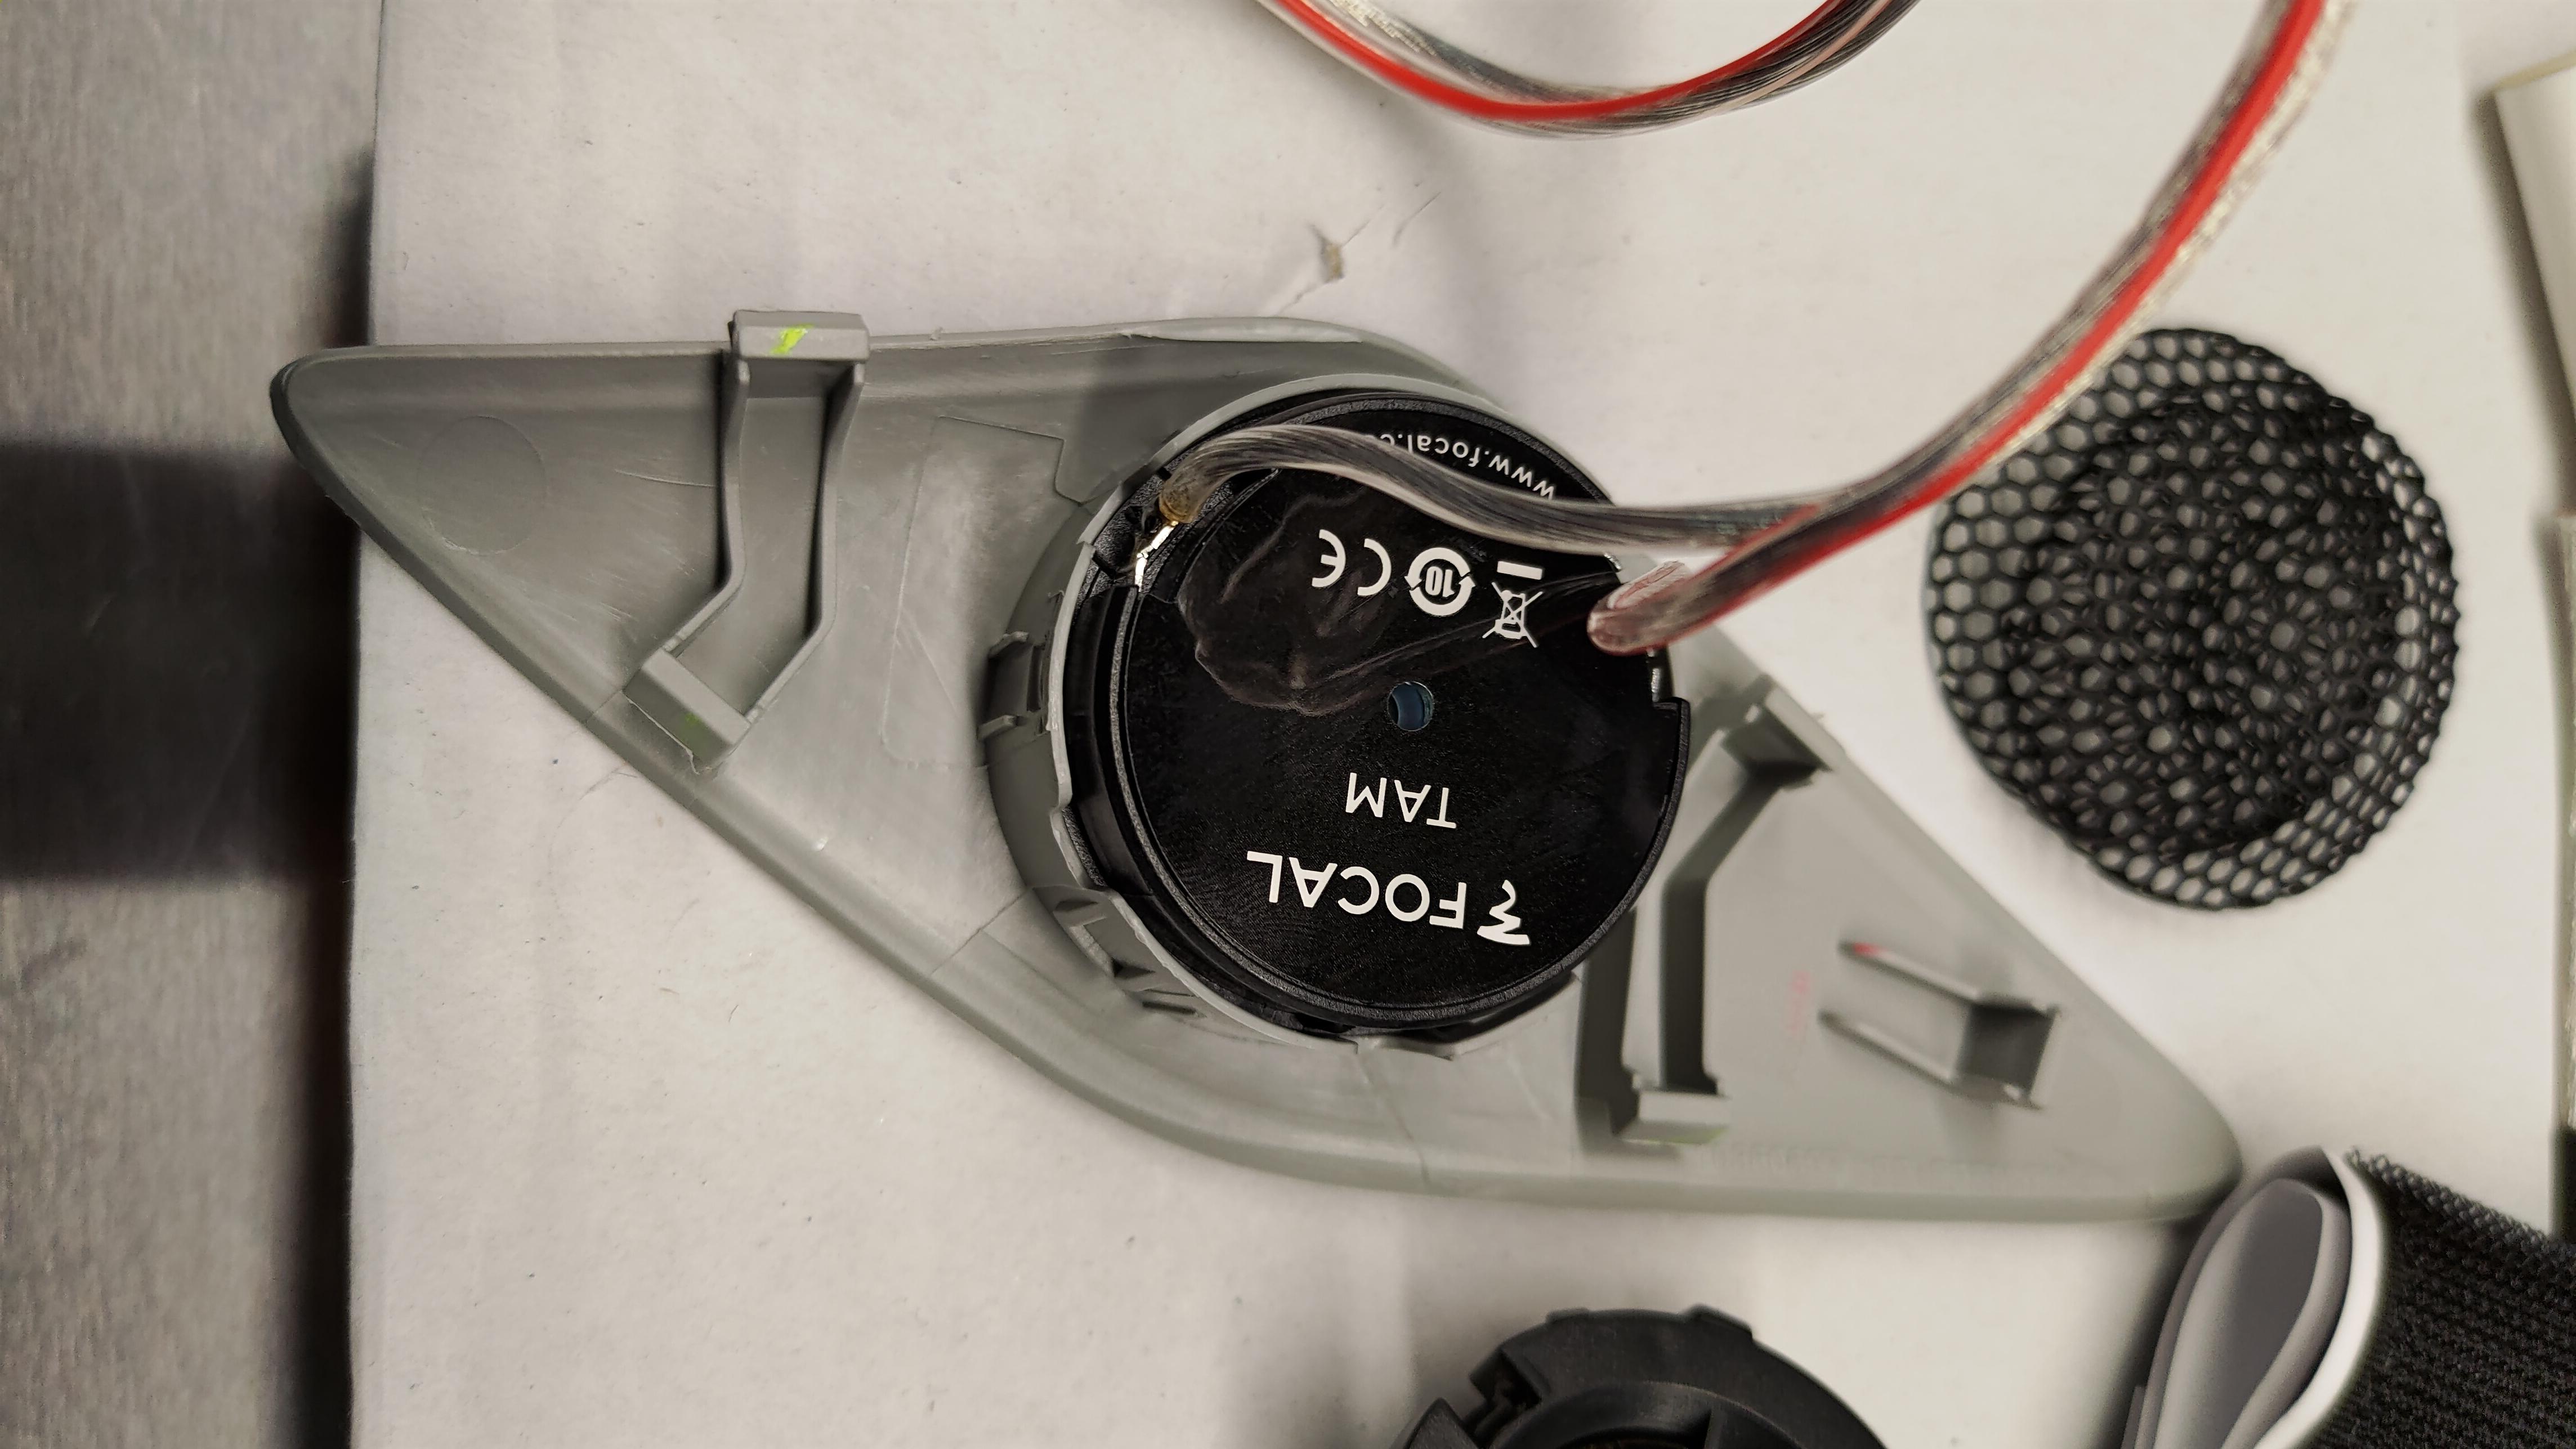
Stock vs focal TAM tweeter. Btw there is no dedicated crossover on the stock tweeters, they are "crossoverd" by a simple 4.7µF capacitor.
Some foam, I dunno why, maybe to make it sit more snug, or something. It just called to me to put foam there.
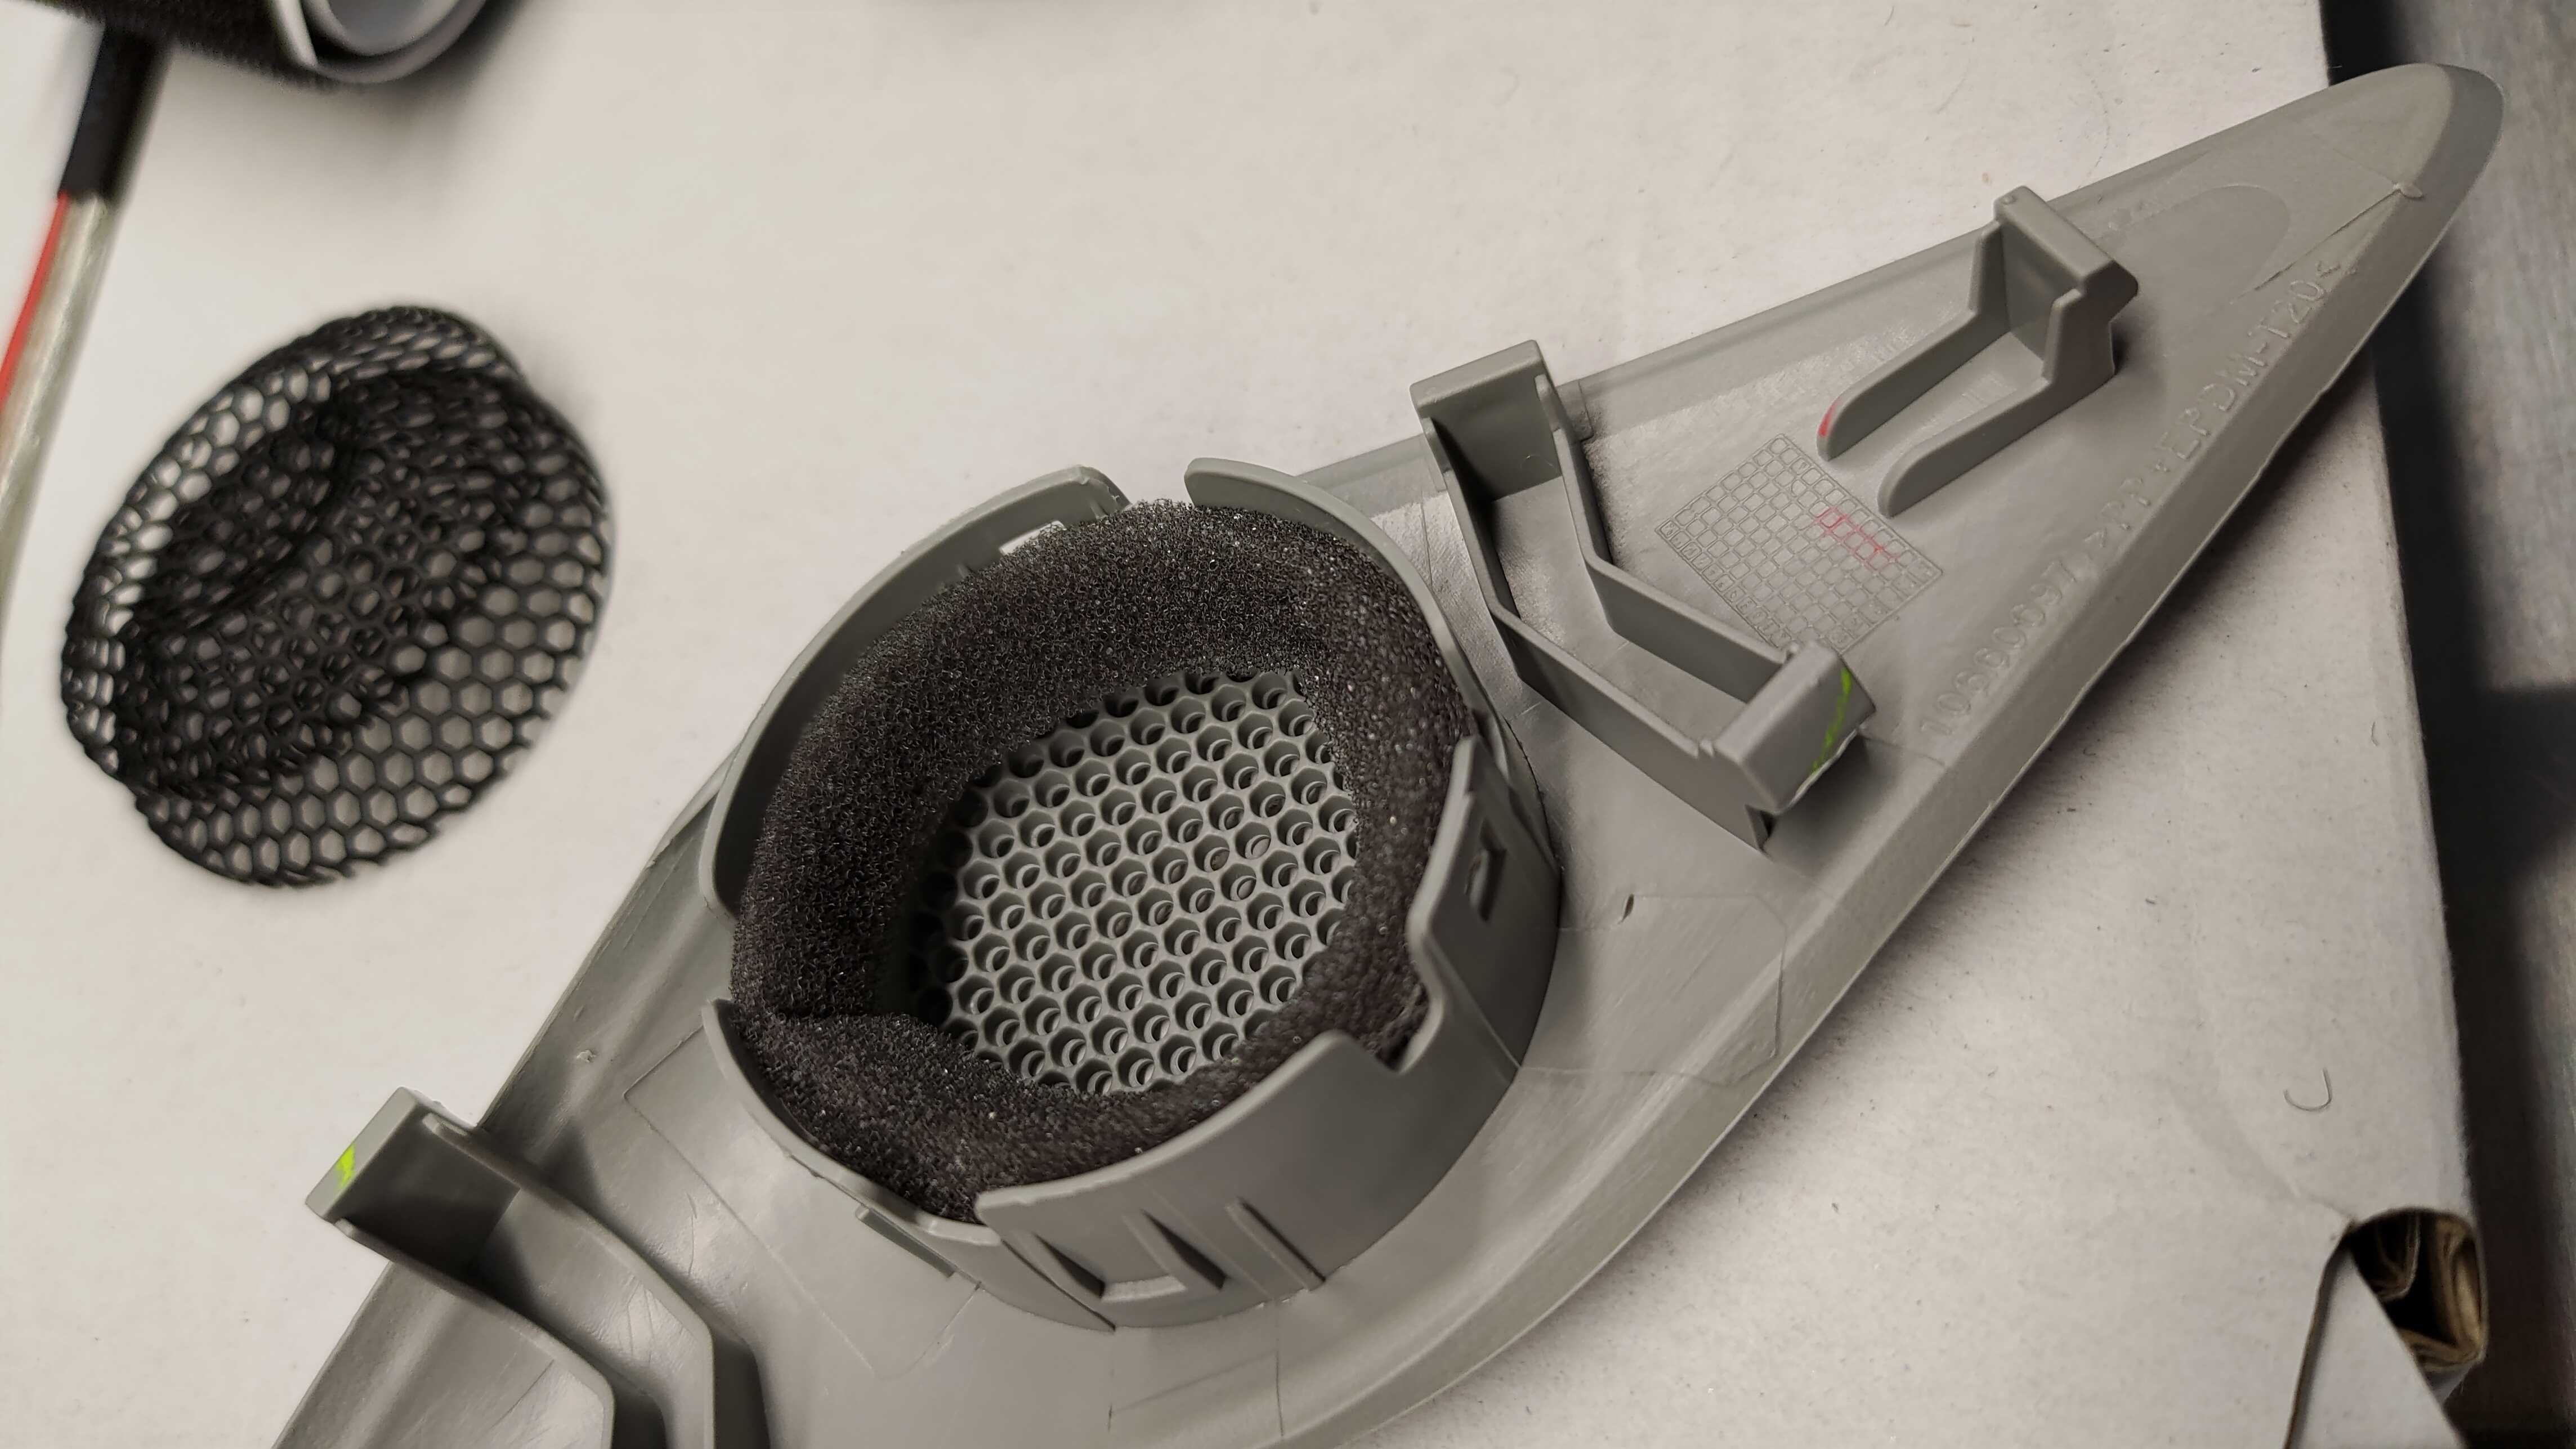
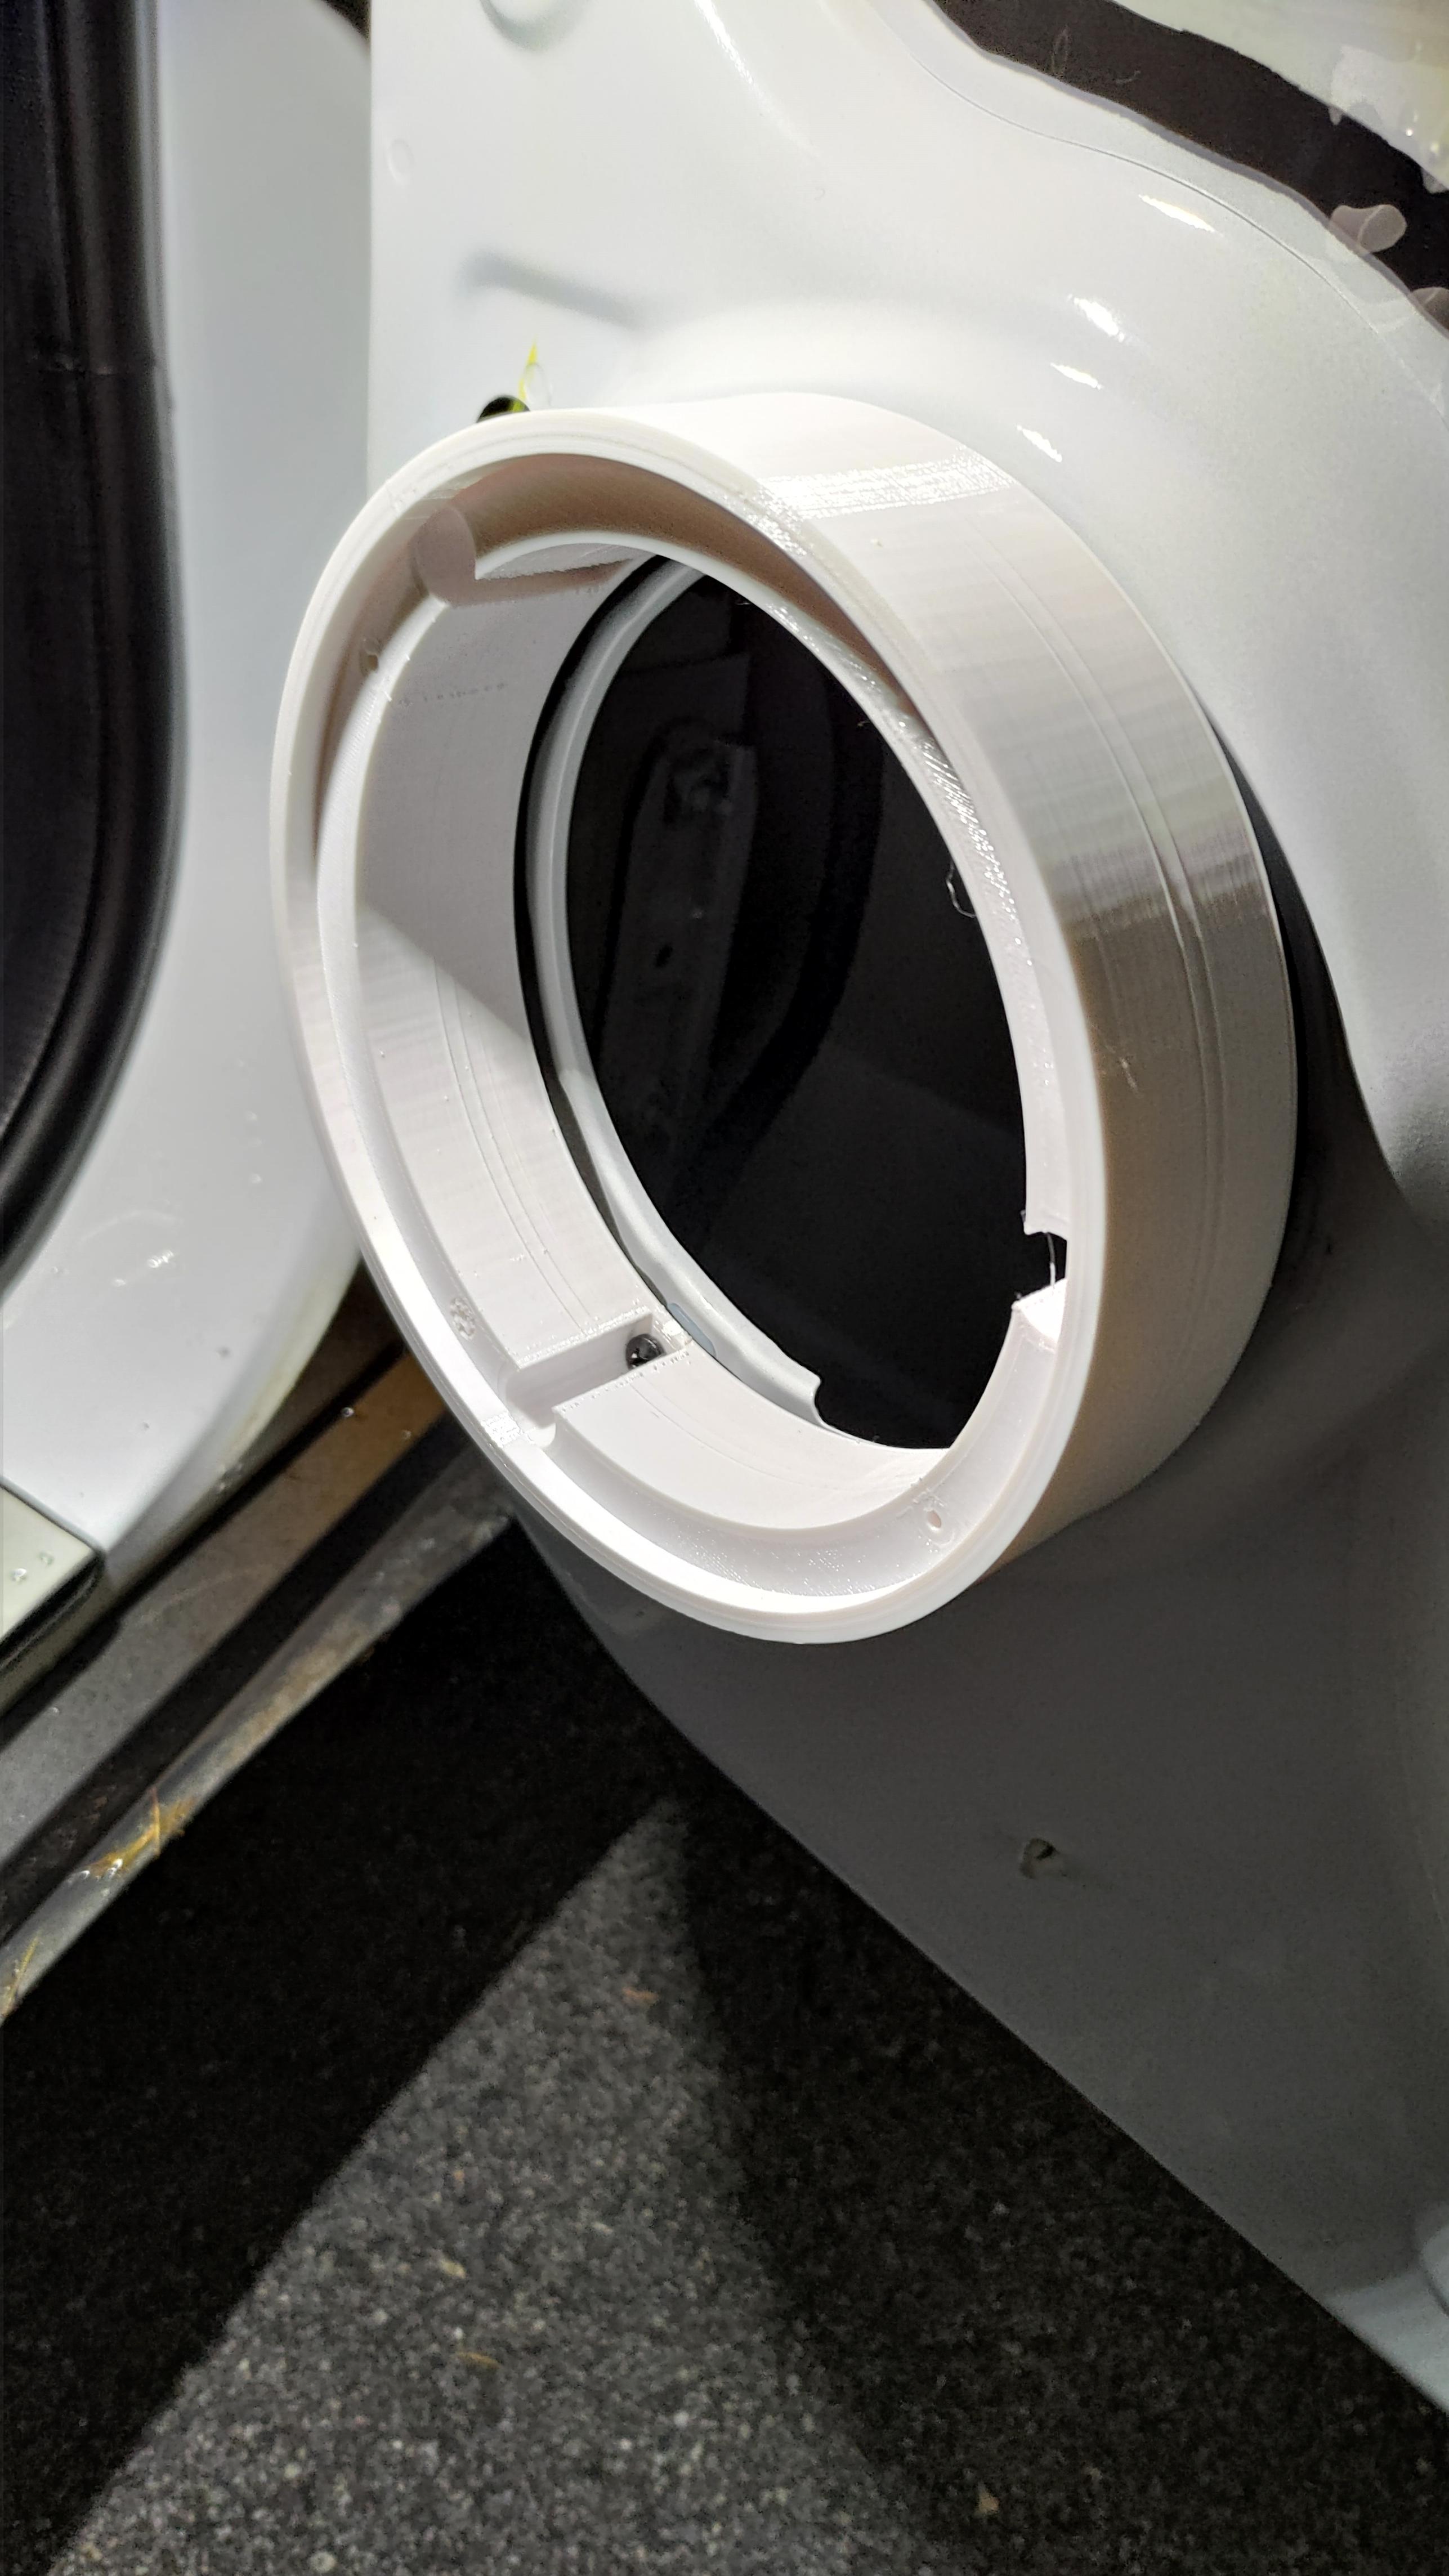
Perfect fit (okay I used a screwdriver and pushed off a little bit of plastic trim to make sure I didn't have to apply too much force to the tweeter.
3d printed door speaker adapters. It was easy to put the cable inside the door so no worries if the connection terminals are on the inside. I forgot to take a picture of the beautiful woofer on, but gonna have to redo this part when I get a roller tool for dampening the metal doors.
Door cards, or the inner panel whatever you call it. Were gracefully dampened with this "eggy" foam. I hate throwing away stock stuff, so the white dampening material was put back on on top of this.
Might update with more later. But the results were amazing. I'd say the biggest upgrade was the amp itself. I was really surprised how much the amp did alone before I installed the focal speakers. The stock tweeters still annoyed me that I felt they were a little muffled. The new ones from focal is bright, maybe too bright. But I'm waiting for my microphone to properly do an RTA (real time analysis) to EQ the car to perfection.
I also wanted to try to document as much I could on the way so maybe others can do the same. My car is a left-hand driving, so I don't know how much is reversed for people in the UK.
Btw I had no experience in car-audio (im a nurse), everything I did I learned through watching youtube videos. Had never popped off a car panel in my life until I tried this.
Disclamer: I don't take any responsibility if your car is diffrent or if you break something.
Part list:
Amplifier: Match PP86DSP
Adapter harness: Match PP-AC88
Subwoofer: Match PP 10E-Q
Front speakers: Focal PS165FE Flax Evo
Adapter rings: 3D-printed at home; Thingiverse link
Door kit: Ground Zero Doorkit pro
Preparations for the install.
Since no one online could post pics of whats behind the EU head unit, I had to find out myself. Turns out the EU model is using a "quadlock" type to connect. The stock amp pulls power through pin 15+16 of the ISO-plug part. The speaker wiring seem to use standard ISO wiring. I also noticed there is plenty of space around the heady unit on both left and right side, but not big enough to put the PP86DSP amp in there. Maybe a small compact amp could fit in there.
Installing the amp
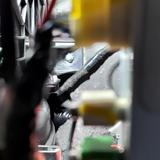
The benefit of the match amp is that its designed to follow stock cables, fetch the high output signal from the stock amp, feed it to the amp then return the amplified signal back to the speakers through the original cables. You can check This blog for some detail on how it is connected. Since MG does its own thing, I bypassed the black part of the adapter and only used the speaker out/in part of the harness. I didn't have my phone with me so didn't take any pics of my wire mess behind the head unit. My plan was to install the amp under the passenger seat.
[ Edit Coulomb: My best guess as to the intended image; was
now
]
Getting power to the amp:
Finding a place to poke through the firewall wasn't easy. I ended up using the same gasket as where the all the rest of the cables enter the cabin, really hoping I would not damage any other wires.
Behind the glovebox is the fusebox and this extra box which is something to do with the radio. (ignore the temporary ground cable). Remove the two bolts to get better access to the gasket. On the second pic you can see the cable entering through.
To my frustration, the firewall features a double gasket, so make your your have the tools to pierce something through and also grab the wire.
Wire diagram: Red = positive energy, green = match amp cable, yellow = ground cable, purple = sub cable
In order to remove the trims and panels you first need to pull off the gasket going around the door, its simply pulled right off and you only need to take a bit of it off to get to the trims. The stock cable is running through here but there is plenty of room for more. You can also see at the bottom part of the picture where I decided to go under the carpet to pull wires to/from the amp. The trim is really long and doesn't really come off properly, but you should manage to put cables in with it halfway off. Getting the subwoofer cable was a little tricky at the back door as the same piece of trim wasn't able to pop completely off, so I had to leverage with force to be able to squeeze in the cable, carefully making sure nothing of the trim would put pressure on any cables.
I don't have any pics, but there is a little cut-out where the backseat belt is attached, tha'ts where I was able to pull the subwoofer cable throught and feed it under the cover behind the back seats. I picked the largest subwoofer so I had to remove the styrofoam piece which is neatly displaying the emergency tools and charger. But the trunk cover still fits on the top level.
This is where my cable on the "inside" of the carpet enters and you can also see an incredible convenient location for bolting on the GND wire.
This is with the corner panel off, it was really tricky to pull off but just be firm and gentle and it will eventually give out. Both clips were still on the chassis after pulling it off.
This is the result for the install so far. There are already cutouts for cables to the chair and also a semi cutout for some box which was easy to use. I secured the amp with some simple velcro underneath, its not sliding anywhere. I could also have planned better or trimmed the cables shorter but I kinda wanted ease of access to pull the amp out without disconnecting anything.
If anything I've learned from watching youtube, is that all cables should be protected or covered in fleecetape (soft fuzzy tape?) to reduce rattling. Here is example of my power cable covered in flex hose for protection and then covered the part which is exposed to movement in fleecetape.
This is how the (now sleeved) powercable is wired, make sure the cable goes down from the gasket and then up to make a loop which makes eventual any water run away from the gasket. I'll 3d print some plastic eventually to make a pretty platform for the fuseholder to attach to.
Now on to the speaker install. To my discovery there isn't a hole between the gasket connecting the door to the main body of the car. There is in fact a connector in there. So that means I cannot put the crossover at the door, and it makes it hard to splice off any original cable cause everything is so well put together.
So therefore I had to make my crossovers as a cluster to wire into the harness behind the headunit. It connects between the amp and the stock harness. The door woofers can then use stock cables, and I can pull new speaker cables to the tweeters in the A-pillar and wire them to this abomination. The crossovers were wrapped into some speaker cloth material to make it lay soft and not rattling behind the head unit.
Stock vs focal TAM tweeter. Btw there is no dedicated crossover on the stock tweeters, they are "crossoverd" by a simple 4.7µF capacitor.
Some foam, I dunno why, maybe to make it sit more snug, or something. It just called to me to put foam there.
Perfect fit (okay I used a screwdriver and pushed off a little bit of plastic trim to make sure I didn't have to apply too much force to the tweeter.
3d printed door speaker adapters. It was easy to put the cable inside the door so no worries if the connection terminals are on the inside. I forgot to take a picture of the beautiful woofer on, but gonna have to redo this part when I get a roller tool for dampening the metal doors.
Door cards, or the inner panel whatever you call it. Were gracefully dampened with this "eggy" foam. I hate throwing away stock stuff, so the white dampening material was put back on on top of this.
Might update with more later. But the results were amazing. I'd say the biggest upgrade was the amp itself. I was really surprised how much the amp did alone before I installed the focal speakers. The stock tweeters still annoyed me that I felt they were a little muffled. The new ones from focal is bright, maybe too bright. But I'm waiting for my microphone to properly do an RTA (real time analysis) to EQ the car to perfection.
Last edited by a moderator:


 )
)")


