xblackwolf90
Established Member
- Joined
- Jul 15, 2024
- Messages
- 72
- Reaction score
- 120
- Points
- 36
- Location (town/city + country)
- Staffordshire
- Driving
- MG5
Hi all,
I wanted to put together a brief overview of the DIY method to get your MG5 working on Tesla Superchargers.
The Issue
By default, MG5s will not charge at open Tesla Superchargers. Facelift models will fail to connect and the central infotainment unit will display "Electrical Grid Abnormal". Pre facelift models will also fail to connect.
The Fix
A software update for the EVCC (Electronic Vehicle Communication Controller) is provided by MG to enable compatibility with these chargers. However, MG class this as an enhancement so will not cover this under warranty.
Some dealers are fully aware of the update and will apply free of charge as part of a service, others will charge up to £200, and others are completely unaware of the update and are unable to assist. The number of dealers willing to install the update for free seems to be significantly limited.
Note: for standard range models, the whole EVCC unit needs to be physically replaced. This is a dealer only job and will cost around £1000.
Special thanks for the overall software update guide posted by @haloweenhamster at this link:
Some screenshots (marked with a *) are taken directly from this user's posts, no credit claimed for these by myself.
Compatible Cars
This guide is for MG5 Long Range models (facelift and non-facelift models).
Standard range models will require the EVCC module to be physically changed, so you will need to contact your dealer.
Disclaimer
This is completed at your own risk. I had no issues, but I accept no liability for any issues you may experience as part of this guide.
Required Hardware
- A laptop (or PC you can take out to the car)
- A VDI tool. I used this one: VNCI VDI3 für Rongwei MG Wuling Baojun Datong Diagnoseschnittstelle unterstützt DoIP- und CANFD-Protokoll, passend für SAIC-Gruppensoftware - AliExpress 34
How To
Create an MG Account
1) Head to MG - Repair & Maintenance Information
2) Select "Start Standardised Navigation ->User Administration -> Register"
3) Fill out the form and change "Type of Customer" from "Person" to "Company"
4) When entering company details, these are not checked by MG. I entered the VAT no. of the business where I work.
Pay for Access to SIPS
Once registered above, complete the following. Ensure you have your VDI tool at this point.
1) Select "Start Standardised Navigation ->Payment"
2) Under "Offboard diagnostic information system service - diagnostics", Select the required time. 1 hour might be a little rushed depending on how quick you are on a computer. I would recommend 24 hours to give you plenty of time.
3) Complete payment.
Download Required Software
1) Select "Start Standardised Navigation -> Download Area"
2) Download and install "VCI Manager"
3) NEW Download SIPS from this link: software – Google Drive
Step 3 above is to install a slightly older version of SIPS. As per post from @AntM below, you may come across additional challenges with the latest version of SIPS. I do not know why this presents for some users and not others, but using the previous version should prevent this happening.
Connect the Hardware and Connect the VDI Tool to Your Laptop
1) Plug in your VDI tool
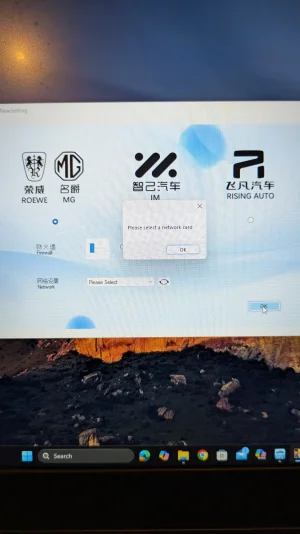
2) Open VCI manager
3) If an option to select the tool is presented with 3 options, select "VDI 3").
4) Click connect. The below will show the tool connected*

Head to your car and connect the diagnostic tool
** IMPORTANT **
I would recommend keeping your laptop plugged into a power source during this update to ensure the battery doesn't go flat whilst installing.
Power on the car without pressing the brake pedal. Your power button should be green, but the vehicle must not be in ready mode.
1) Plug the VDI tool into your car. The port is below the steering wheel to the left. Some flexibility is needed here!
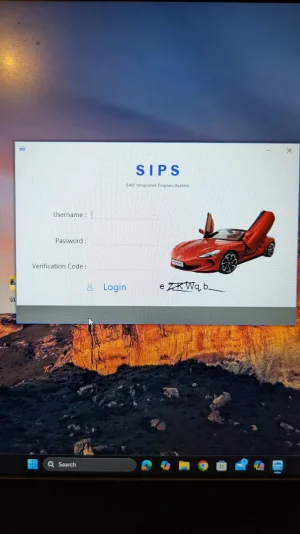
2) Open SIPS on your laptop.
3) You'll be asked to login. Head back to Welcome to nginx!, click "Your Name -> User Profile"
4) The username and password for SIPS will be displayed as "SNW Account Name"*

It will take several minutes to scan the car. SIPS will display "Vehicle Information is Processing". Just wait for a little while for this to complete.
5) Vehicle information will be displayed. You can accept / click yes.
Identify and install the update
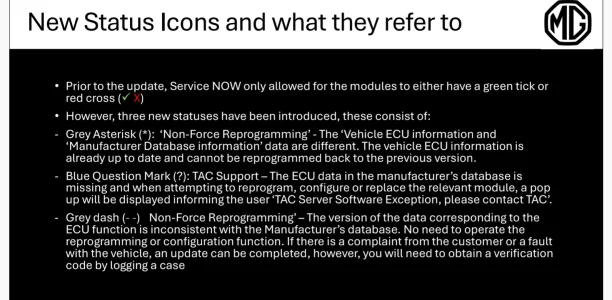
1) Click 'ECU Information'. You'll see in the list that the EVCC module will require an update:

2) Click "Programming and Coding"
3) Select "EVCC(Electric Vehicle Communication controller)"
4) Select "Reprogram" and click "Next"
Once the update is downloaded, you'll be asked to confirm the vehicle is powered on and in park. Click "Next":

The software will download and install.
IMPORTANT
Your car will suddenly completely power off at this point, as soon as you click "Next". This is normal.
The update will then install and take around 3 minutes.
Your car will restart after install and display "Invalid Key". This is normal.
Testing
You can now disconnect the VDI tool and power your car off and head to a Tesla charger!

I wanted to put together a brief overview of the DIY method to get your MG5 working on Tesla Superchargers.
The Issue
By default, MG5s will not charge at open Tesla Superchargers. Facelift models will fail to connect and the central infotainment unit will display "Electrical Grid Abnormal". Pre facelift models will also fail to connect.
The Fix
A software update for the EVCC (Electronic Vehicle Communication Controller) is provided by MG to enable compatibility with these chargers. However, MG class this as an enhancement so will not cover this under warranty.
Some dealers are fully aware of the update and will apply free of charge as part of a service, others will charge up to £200, and others are completely unaware of the update and are unable to assist. The number of dealers willing to install the update for free seems to be significantly limited.
Note: for standard range models, the whole EVCC unit needs to be physically replaced. This is a dealer only job and will cost around £1000.
Special thanks for the overall software update guide posted by @haloweenhamster at this link:
There was a comment about a guide for software updates so I thought I'd write it here where all the other info is
To connect to the car you need a Vehicle Diagnostic Interface (VDI), from what I've read a VDI2 or VDI3 for MG4, I personally ended up getting a VNCI due to supply issues, it's also substantually cheaper
 www.vncistore.eu
it's recommended to update connected via USB but I have done some connected via WiFi which worked fine
Once you have the interface you need to install the software on a windows computer, VCI manager &...
To connect to the car you need a Vehicle Diagnostic Interface (VDI), from what I've read a VDI2 or VDI3 for MG4, I personally ended up getting a VNCI due to supply issues, it's also substantually cheaper
VNCI VDI3 Rongwei MG Wuling Baojun Datong Diagnostic Interface Compatible with OEM Software Driver
VNCI VDI3 Rongwei MG Wuling Baojun Datong diagnostic interface is compatible with OEM software driver, plug and play. It can be an alternative genuine VDI3 diagnostic interface.
Once you have the interface you need to install the software on a windows computer, VCI manager &...
Some screenshots (marked with a *) are taken directly from this user's posts, no credit claimed for these by myself.
Compatible Cars
This guide is for MG5 Long Range models (facelift and non-facelift models).
Standard range models will require the EVCC module to be physically changed, so you will need to contact your dealer.
Disclaimer
This is completed at your own risk. I had no issues, but I accept no liability for any issues you may experience as part of this guide.
Required Hardware
- A laptop (or PC you can take out to the car)
- A VDI tool. I used this one: VNCI VDI3 für Rongwei MG Wuling Baojun Datong Diagnoseschnittstelle unterstützt DoIP- und CANFD-Protokoll, passend für SAIC-Gruppensoftware - AliExpress 34
How To
Create an MG Account
1) Head to MG - Repair & Maintenance Information
2) Select "Start Standardised Navigation ->User Administration -> Register"
3) Fill out the form and change "Type of Customer" from "Person" to "Company"
4) When entering company details, these are not checked by MG. I entered the VAT no. of the business where I work.
Pay for Access to SIPS
Once registered above, complete the following. Ensure you have your VDI tool at this point.
1) Select "Start Standardised Navigation ->Payment"
2) Under "Offboard diagnostic information system service - diagnostics", Select the required time. 1 hour might be a little rushed depending on how quick you are on a computer. I would recommend 24 hours to give you plenty of time.
3) Complete payment.
Download Required Software
1) Select "Start Standardised Navigation -> Download Area"
2) Download and install "VCI Manager"
3) NEW Download SIPS from this link: software – Google Drive
Step 3 above is to install a slightly older version of SIPS. As per post from @AntM below, you may come across additional challenges with the latest version of SIPS. I do not know why this presents for some users and not others, but using the previous version should prevent this happening.
Connect the Hardware and Connect the VDI Tool to Your Laptop
1) Plug in your VDI tool
2) Open VCI manager
3) If an option to select the tool is presented with 3 options, select "VDI 3").
4) Click connect. The below will show the tool connected*
Head to your car and connect the diagnostic tool
** IMPORTANT **
I would recommend keeping your laptop plugged into a power source during this update to ensure the battery doesn't go flat whilst installing.
Power on the car without pressing the brake pedal. Your power button should be green, but the vehicle must not be in ready mode.
1) Plug the VDI tool into your car. The port is below the steering wheel to the left. Some flexibility is needed here!
2) Open SIPS on your laptop.
3) You'll be asked to login. Head back to Welcome to nginx!, click "Your Name -> User Profile"
4) The username and password for SIPS will be displayed as "SNW Account Name"*
It will take several minutes to scan the car. SIPS will display "Vehicle Information is Processing". Just wait for a little while for this to complete.
5) Vehicle information will be displayed. You can accept / click yes.
Identify and install the update
1) Click 'ECU Information'. You'll see in the list that the EVCC module will require an update:
2) Click "Programming and Coding"
3) Select "EVCC(Electric Vehicle Communication controller)"
4) Select "Reprogram" and click "Next"
Once the update is downloaded, you'll be asked to confirm the vehicle is powered on and in park. Click "Next":
The software will download and install.
IMPORTANT
Your car will suddenly completely power off at this point, as soon as you click "Next". This is normal.
The update will then install and take around 3 minutes.
Your car will restart after install and display "Invalid Key". This is normal.
Testing
You can now disconnect the VDI tool and power your car off and head to a Tesla charger!
Last edited:


