Swaineman
Standard Member
- Joined
- Jun 10, 2022
- Messages
- 34
- Reaction score
- 12
- Points
- 12
- Location (town/city + country)
- Sheffield England
- Driving
- HS PHEV
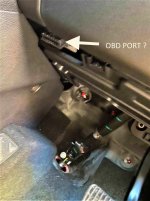
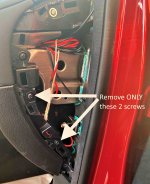
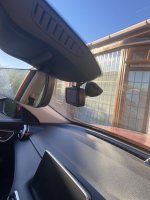
Just fitted my Nextbase dash cam using an OBD port gizmo bought from Amazon. Only took about 15 minutes. Was a bit dubious about how they work and switch off power but all seems good at the moment. After slot of research opted for this one
OBDII OBD Power Cable for Dash... Amazon product ASIN B07TV2Y6XB
Has two settings, on all the time or off after 5 minutes of switching off the ignition. I've tested it and it works fine, saves a lot of hassle and cost less than a tenner.
OBDII OBD Power Cable for Dash... Amazon product ASIN B07TV2Y6XB
Has two settings, on all the time or off after 5 minutes of switching off the ignition. I've tested it and it works fine, saves a lot of hassle and cost less than a tenner.
 .
.
 )
) ) I have now ordered From Amazon:
")
")