fnegroni
Prominent Member
- Joined
- Jul 8, 2023
- Messages
- 1,611
- Reaction score
- 1,661
- Points
- 522
- Location (town/city + country)
- London, UK
- Driving
- MG4 EV Urban
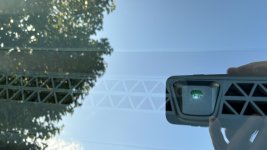
So I removed the cover using a plastic lever as not to damage anything.
Definite improvement.
Now debating whether to run without cover or to put a hole in that cover with a Dremel.
I also removed the sensor altogether just to see if it's a standard part that can be found with different specs or whether somehow it can be calibrated/programmed using an arduino board.
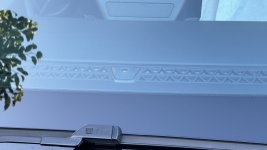
I bit the proverbial bullet and drilled a hole in the original cover.
Made it slightly wider, so that it looks a bit more oval than round.
Using a dremel bit, I initially thought I could simply polish the inside of the cover to let more light through without drilling a hole, but didn't make any difference.
I then cut out a make-shift cover out of a take-away clear plastic container, also matt finish but clear rather than dark in colour, and it worked really well, proof that the current sensor is not calibrated correctly.
Test drive this evening, all is well, definitely less sensitive to shadows in broad daylight, and lights now come on around the same conditions as my other car, which is maybe more sensitive than others but nowhere near as temperamental!
Tonight will be the real test, driving under street lights.
Definite improvement.
Now debating whether to run without cover or to put a hole in that cover with a Dremel.
I also removed the sensor altogether just to see if it's a standard part that can be found with different specs or whether somehow it can be calibrated/programmed using an arduino board.
I bit the proverbial bullet and drilled a hole in the original cover.
Made it slightly wider, so that it looks a bit more oval than round.
Using a dremel bit, I initially thought I could simply polish the inside of the cover to let more light through without drilling a hole, but didn't make any difference.
I then cut out a make-shift cover out of a take-away clear plastic container, also matt finish but clear rather than dark in colour, and it worked really well, proof that the current sensor is not calibrated correctly.
Test drive this evening, all is well, definitely less sensitive to shadows in broad daylight, and lights now come on around the same conditions as my other car, which is maybe more sensitive than others but nowhere near as temperamental!
Tonight will be the real test, driving under street lights.