Rear screen washer failure.

Just been told by MG Dealers in leeds to leave the issue for them to sort out under warranty and not to have a go at a repair myself so it’s booked in 3 weeks time
Went to dealership after nearly a 4 week wait for washer pipe sorting out because I was to that they ad to do a repair/fix etc to keep up the warranty all that was done was to push the pipe back together again I’m expecting it to come apart again time will tell.
 

Attachments

  • IMG_0171.webp
    IMG_0171.webp
    236.9 KB · Views: 32
Looks the same as it did a month ago?
I put it back together a month or so ago when it came off but while waiting for them to look at it the pipe came off again when I picked the car up I ad a quick look to see what ad been done to solve the problem that’s it just put back together again forgot to take new picture of what they ad done this time which was nothing would like to know what other dealers have done to solve the problem.
 
Mine did the same. I fixed it myself in 30mins
 

Attachments

  • 20260106_094707.webp
    20260106_094707.webp
    276.7 KB · Views: 30
  • 20260106_094857.webp
    20260106_094857.webp
    351.8 KB · Views: 26
  • 20260106_094819.webp
    20260106_094819.webp
    465.9 KB · Views: 27
  • 20260106_094809.webp
    20260106_094809.webp
    123.7 KB · Views: 27
  • 20260106_094757.webp
    20260106_094757.webp
    90.8 KB · Views: 24
So, it is fixed and since I quite like to see photos before I tackle something I shall present some here.

1. Disconnect the battery…you are going to be working near an airbag so it’s a good idea.
View attachment 34228

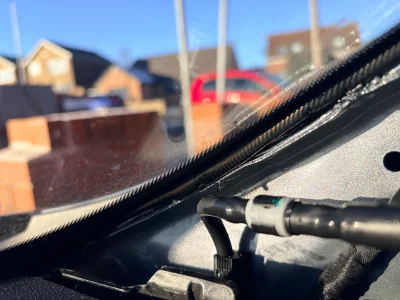
2. Remove the door seal around the front half of the door.
View attachment 34229

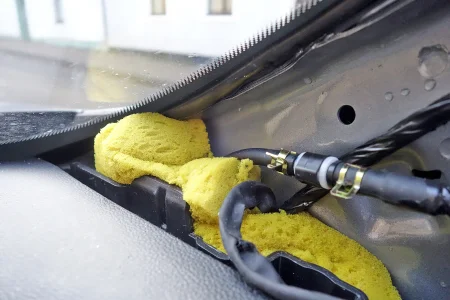
3. Remove the fuse box cover panel to check for any water hanging around. This is probably optional.
View attachment 34230

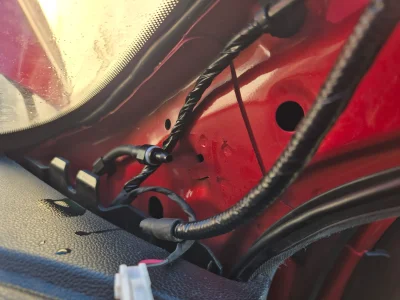
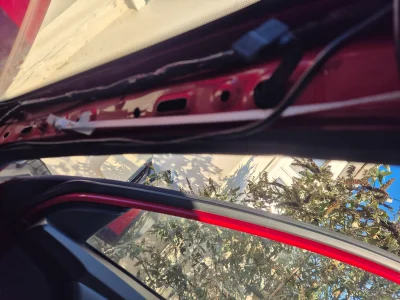
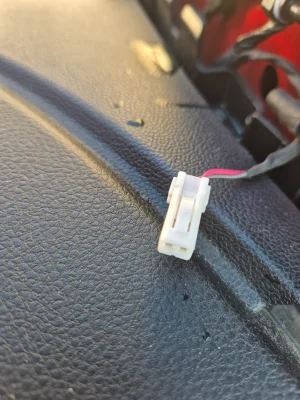
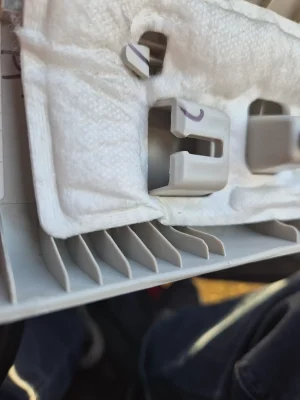
4. Remove the A-pillar trim panel; the top clip just pulls apart but the part on the panel needs sliding up to remove it from the panel as it is tethered to the other half. There is one more standard clip about halfway down. Take care of the speaker wire which can be carefully disconnected.
View attachment 34231

View attachment 34235

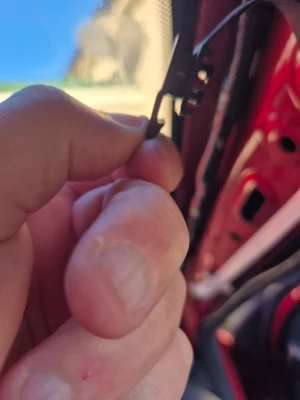
5. Behold the idiotic place that a joiner has been placed. Rejoin and secure the hoses with cable ties, nice and tight to hopefully prevent it from coming adrift. Make sure to fasten the ties inside the barb.
View attachment 34232
View attachment 34233

6. Assuming all is well (perhaps test first) you can refit the pillar trim (don’t forget to plug the speaker back in!) and the fuse box cover. Refit the door seal, ensuring that you push it nice and tight into the corners otherwise you’ll end up with some left over.
View attachment 34234

7. Rejoice in having done a good job and have a tea or coffee, bearing in mind that you definitely deserve a chocolate digestive or two.

Huzzah
Hi, great job done. Stoneacre quote me £210 for investigation and fix. Sorted me self with your help just in 20 min. But, any idea how to reset all those errors on the dashboard after plugging back the battery? All available errors are on the dash:(
 
Hi, great job done. Stoneacre quote me £210 for investigation and fix. Sorted me self with your help just in 20 min. But, any idea how to reset all those errors on the dashboard after plugging back the battery? All available errors are on the dash:(
Drive it all mine disappeared
 
Hi, great job done. Stoneacre quote me £210 for investigation and fix. Sorted me self with your help just in 20 min. But, any idea how to reset all those errors on the dashboard after plugging back the battery? All available errors are on the dash:(
My dealer repaired it for free under warranty.
 
I agree that it's a straightforward job. I had the same problem and used cable ties to secure the pipe where they joined. I used narrow cable ties to maximise the pressure AND pulled them really tight.

BUT despite this, the joint popped off again a few months later.

My second repair seems to be permanent. Another member had suggested using spring clips, and what a difference - really tight. They certainly have done the job - there's no way these are coming off!

I would suggest popping off the tailgate trim panel and putting clips on the joints in there too. There is also a joint under the bonnet, but I left that one as it was. My logic was that if the pressure in the pipe builds up again but has nowhere to go, it could result in a bigger problem. If the joint under the bonnet pops off, the water should just run away ... and it's easily accessed for a refit. That said, I've had no trouble since repair number 2.

I think I used 9mm clips, but can't really be sure. I got a 50 pack of clips of different sizes from Amazon. I see them listed today for £4.99 which, for peace of mind, is well worth it.


PS the sponge? That was to try to avond any spillage falling on the control modules behind the driver's kick panel.
 

Attachments

  • 7.webp
    7.webp
    336.5 KB · Views: 2
Support us by becoming a Premium Member

Latest MG EVs video

MG4 EV Refresh + NEW MG4 EV Urban - UK arrival dates, prices, specs (2026)
Subscribe to our YouTube channel
Back
Top Bottom